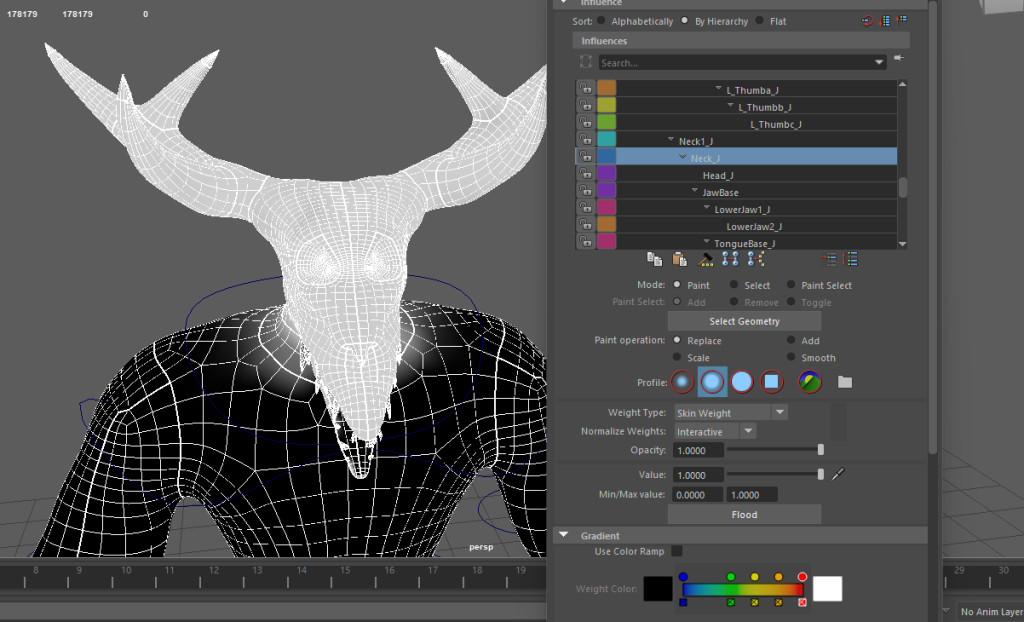
After finishing the base rig, I moved on to weight painting. Weight painting is a step in the rigging process that connects the bones to the 3D model. May allows me to select, add, smooth and replace influence on a joint in the paint skin weights tool. Value and opacity can be used to change the strength of the brush so that you could add a specific amount of influence on a selected body part. I needed to link the bones and the model together using the bind skin tool, but if I needed to unbind the skin, I could simply use the unbind skin tool with keep history switched on (this allows me to save the skin weights that I applied so I don’t have to reapply them).
The skin weight process
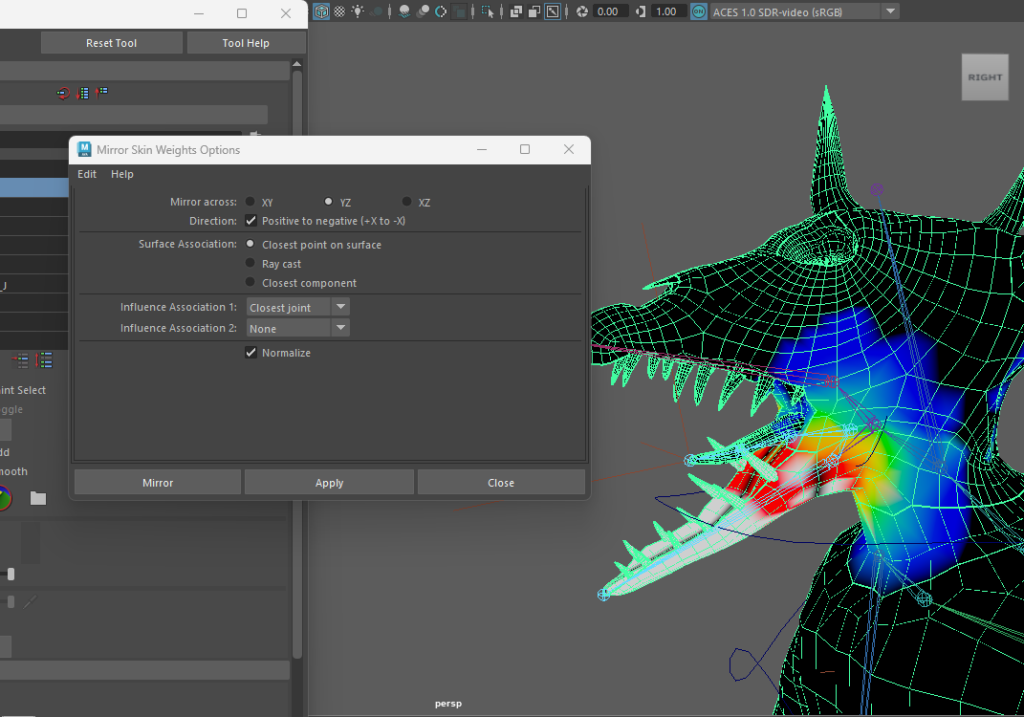
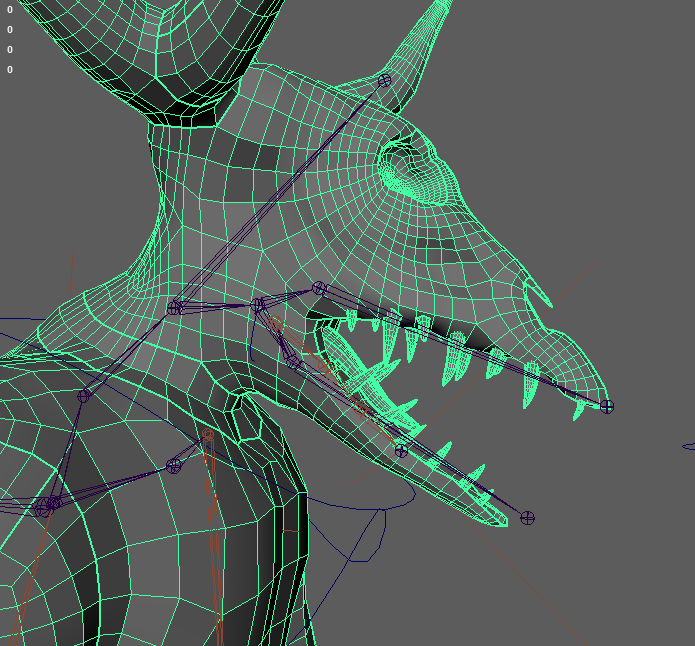
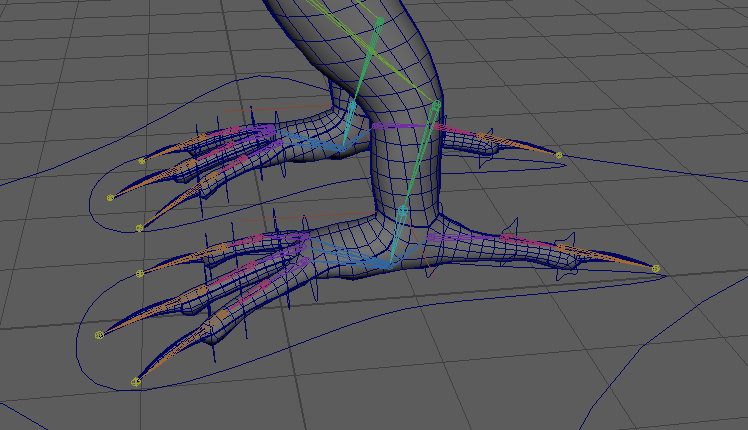
For the most part, applying the skin weights was quite simple, with the influence on the arms, legs, fingers, toes, and tail being the easiest to apply because the system performed the majority of the work in terms of overall influence placement. I only needed to slightly alter the influence of these places to accurately simulate the movement of these body parts, and best of all, I only had to do one side because Maya has a function called “mirror skin weights” that allows you to mirror the weights you put on one side to the other. The torso was similarly fine for the most part, with only minor adjustments required. However, the most serious issue was with the head, as there were numerous joints for jaw and tongue movement, causing them to move in an unusual manner, as shown below.

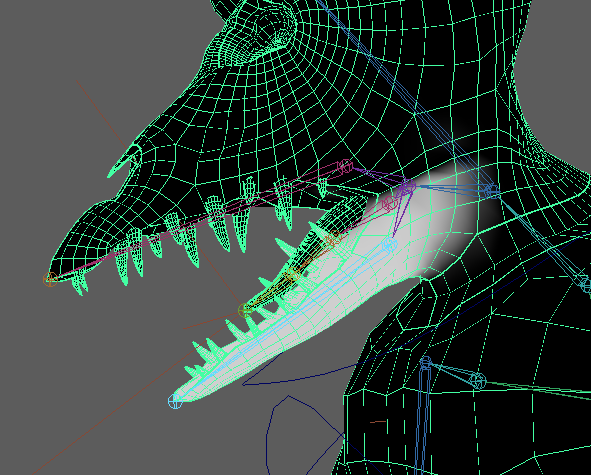
Naturally, I needed to address this, so I experimented with the influence as well as eliminating and rearranging the joints in the tongue/jaw area. I repaired the head movement first, which was easier than fixing the tongue/jaw area because the remainder of the head is made up of fewer joints. I then fixed the jaw influence by simply creating an upper and lower jaw joint with influence over the selected portions, which I was able to do using the skin weights menus replace and select tools. The tongue was by far the worst one to make; the influence was off, and as I was trying to remedy it, the influence shifted to different body parts, which I eventually managed to fix with the help of the select tool.
IK FK Switch (Arms only)
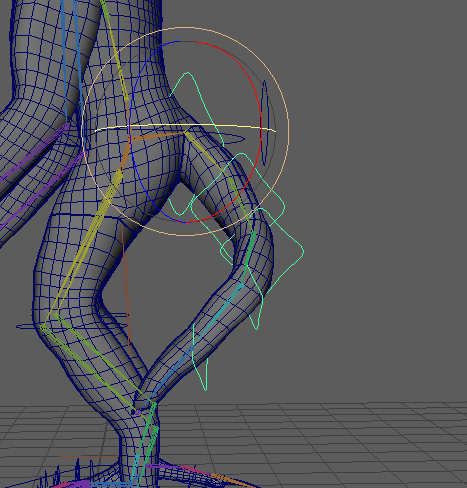
After adjusting the weight painting it was time for me to make an IK FK switch for the arms of my character. This would allow me to move the arms without much restriction, unlike with just using IK where it restricts the rotation of the arm. As usual, I added in controls for the IK arms as I did before with a control on the wrist joint, but for FK the process was a bit more complex, as I needed make controls for the wrist, elbow and shoulder joints as seen below. I used a different method for keeping the control attributes at a default value, as I put each control into a group and then parent the groups onto the controls. To make this work I had to move the groups and not the controls. After that I had to add an IK FK switch control so that I could switch between the IK and FK arms, but I would also have to parent the IK FK arms to the original arms as that will be important for the switch to work effectively.

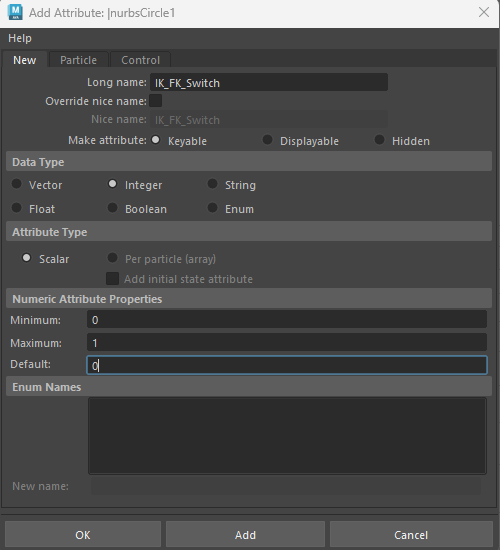
When I finished setting up the IK and FK arms, it was time to set up the control switch. I needed to use the node editor on the IK FK switch control and use the IK FK switch attribute as mentioned earlier and connect it to a specific attribute in each joint (that would allow the original joints to move with the IK or FK joints) for both the IK and FK arms. The reverse is for when the value is 0, so I set the FK arm values to that, and I connected the IK attributes directly to the control as the value would be at 1. I also did this to tag the visibility of the controls on and off similarly to the other values as mentioned earlier.

Extra controls
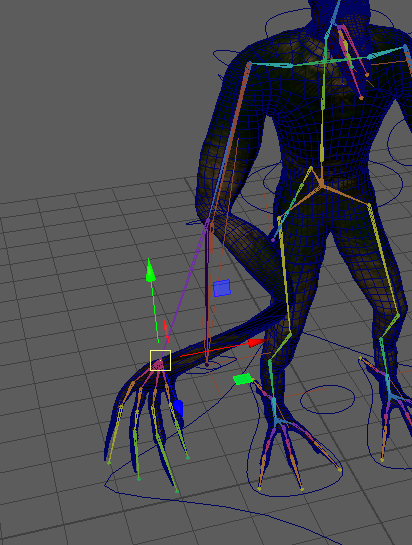
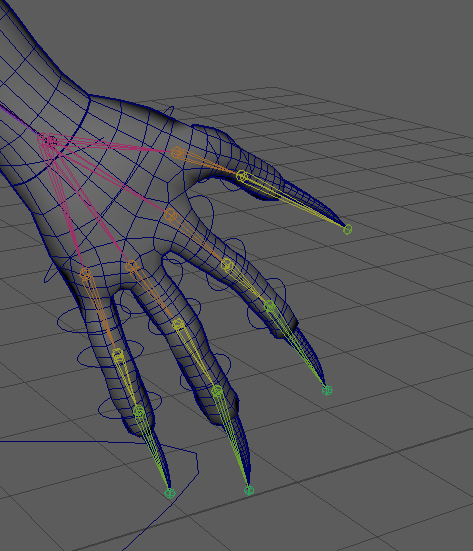
After making the IK FK switch, I decided to make some more controls for the fingers, toes, and tail. For the tail I initially started with an IK control but it did not work out as intended as the tail was moving off to the side unintentionally. Therefore, I decided to make the tail work the same as the FK arms, which meant that I had to place a control and orient constrain it to each joint in the tail. This ended up working fairly well as the tail could move and flex as I wanted it to. The fingers and toes also had a similar process, with each control being orient constrained to each joints as seen below. I also make a control for the tongue that has the exact same process applied to it as well, but I parented it to the jaw control.
Movement Tests
Below are the movement tests that I have made for the character model after getting all of the controls sorted out. I am fairly impressed with the results, as I initially had issues with the weight painting.