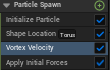
Before I continue to the production process, I need to make the visual effects that I started earlier. This is still a part of the pre-production process as I have not started filming the sequence with the camera yet. I will be using the knowledge that I have gained from learning what different Niagara system emitters do to make the effects that I want to make as accurately as I can to make them work effectively in my product. Niagara systems can have multiple emitters (these spawn in the particles) depending on the type of visual effect that I would want to have, for example: fire can have the fire itself, the sparks coming off the fire and the smoke that also comes out of the fire, so I would have to consider this whilst I am creating my particle effects.
Fireflies
The first visual effect that I started making was the fireflies, which only needed one emitter in total to work, which is called the hanging particulates emitter. This emitter just spawns floating particles in a rectangular shape, but since I was making fireflies, I wanted it to look more alive. I significantly raised the wind force of the emitter while also making sure that the particles disappear (able to be changed through initialise particle option) after a while to make it seem as though they are flashing. After those two major changes I had to also change the colour of the hanging particulates, so I simply just selected the initialise particle option in the emitter so that I could change the colour to a bright greenish yellow to reflect fireflies more.
Fire with smoke
For making the fire, I created three separate particle emitters, with two of them being fountain emitters for the fire and smoke and one being the hanging particulates emitter for the sparks that happen when the fire is burning. I started off by changing the lifetime of the particles so that they would make the emitters look more like fire and smoke, with fire having a shorter lifespan than smoke. Like seen below, I turned off the gravity force for both fountain emitters as fire and smoke are not effected by gravity, I also decreased the velocity speed of both the fountain emitters (in the add velocity option) so that the emitters would more accurately depict the movements of fire and smoke (I made the velocity speed slower in the smoke fountain emitter, as smoke usually travels slower than fire), I also increased the cone angle (how spaced out the particles are within the cone) of both the fire and smoke fountain emitters so that the particles are less concentrated as before. Then I set the sprite for both fountain emitters to the fire and smoke sprites respectively, which made them look more like smoke and fire. Because of this, the visual effect was too small to see, so I had significantly increased the sprite size for both the fountain emitters so that they would be visible. Before I continued, I also changed the colours of both fountain emitters so they are like the colour of the sprites, and I set the sub-UV animation to linear. To finish of the fountain emitters, I repositioned the smoke fountain emitter so that it would be just above the fire rather than inside the fire or way above the fire.
For the hanging particulates emitter, I made the particle colours the same as the particle colour for the fire fountain emitter and set the shape location to a cylinder as seen below. The differences that I have made between this hanging particulate emitter and the firefly hanging particulate emitter is that I sped up the velocity speed, increased wind speed and adjusted the aerodynamic drag option. I also adjusted the particle size so that they would be smaller and spread it around the fountain emitter for the fire itself which meant that I had to move it down so that it did so, otherwise it would have looked out of place in the overall effect.
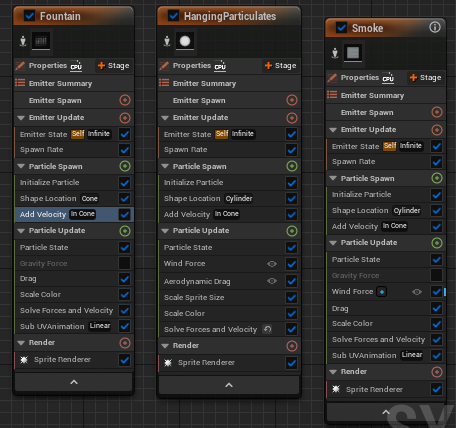
Below is a demonstration of how the fire emitter would look in the sequence itself. For the torch, I made the fire particle smaller with no smoke at all in comparison to this fire over here. This means that I decreased the cone angle and size of the fountain emitter and other options, mainly in the hanging particulates emitter involving the size of the space that the particles can roam in and the spawn rate of the particles as well.
Leaves
The next effect that I was planning to make was some leaves being blown by wind, since the location of my sequence will be a forest environment where naturally there will be leaves falling occasionally due to the wind. The base of this visual effect will be the blowing particulates emitter which simulates an effect of aerodynamic drag and wind turbulence to make the effect look like wind blowing small objects such as leaves or paper. I also used confetti burst emitter, which simulates the fall of multiple small objects such as leaves and confetti in a natural organic way. On each of these emitters’ sprite renderer I used a default bush material on the particles to make them look more like leaves, with only minor adjustments to the particle spawn rate and lifetime in the blowing particulates emitter. However, I needed to adjust the spawn rate of the confetti burst emitter so that it would only trigger once and drastically decrease the particle lifetime for the particles that were present (I had to do this otherwise it would not have looked natural enough). I had to decrease the aerodynamic drag present in both emitters to avoid them going too slowly, more particularly the confetti burst emitter, as it was way slower than the blowing particulates emitter. The only other option that I had to change in the blowing particulates emitter was the wind force, as by default it was a bit too slow, so I slightly adjusted the wind speed resulting in the product as seen below.
Portal
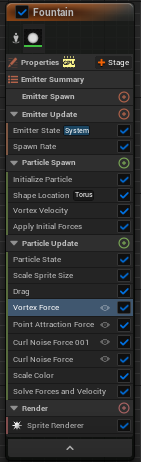
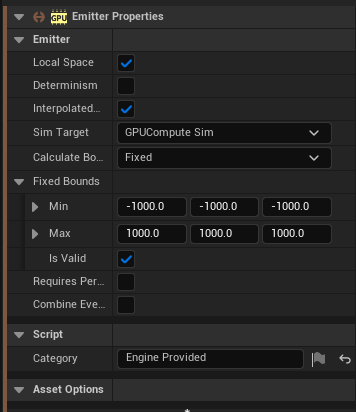
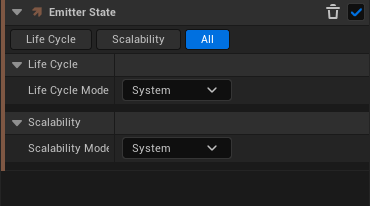
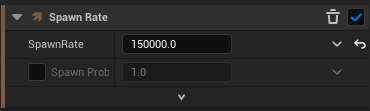
The last effect that I have made using the Niagara system was a portal effect using a fountain emitter. In the emitter panel, I firstly adjusted the emitter properties so that sim target would be GPU compute sim and the fixed bounds would be set from minimum -1000 and maximum 1000 on all axis. I also changed the emitter state scalability life cycle mode to system so that the particles would disappear according to their lifetime and the spawn rate of the particles so that more particles would spawn from this emitter. I also removed the add velocity and gravity force from the emitter as the particles will not move upwards, neither they will be affected by gravity as a result.
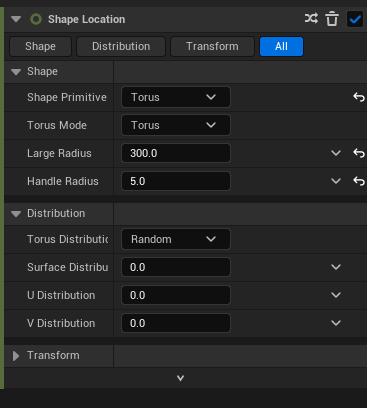
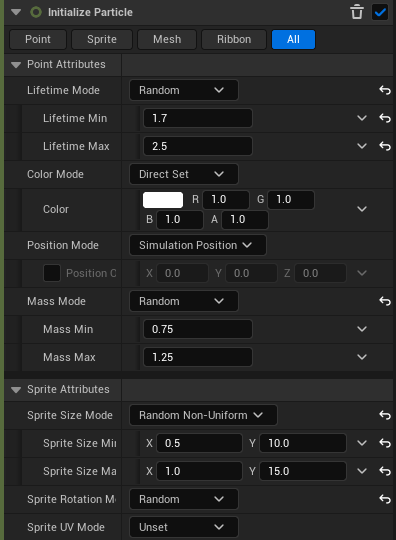
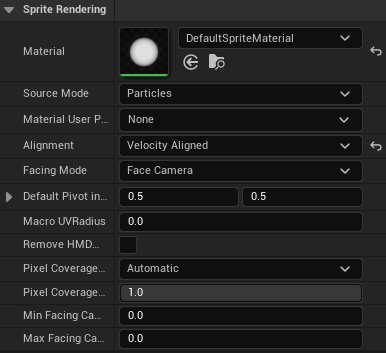
In the shape location, I changed the shape primitive to a torus so that it would look more similar to a portal, whilst also adjusting the large radius and handle radius as seen in the bottom left image. I also changed the particle lifetime as seen in the middle image below and set the sprite size mode to random non uniform with the values as seen in the same middle image below. After that, I went to the sprite renderer in the emitter and changed the alignment to velocity aligned. as seen in the bottom right image.
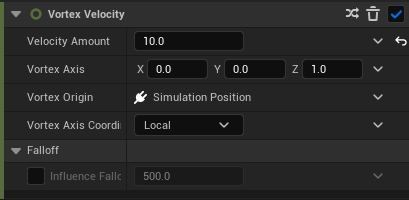
In the particle spawn section of of the emitter, I added a vortex velocity option so that the particles could rotate in a vortex. I set the vortex amount to 10 and set the vortex z axis to 1, with the vortex axis coordinate being set to local as seen below.
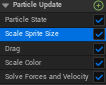
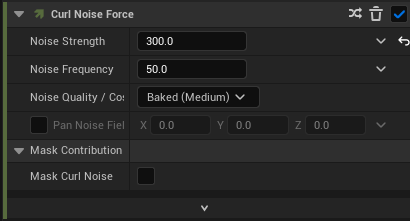
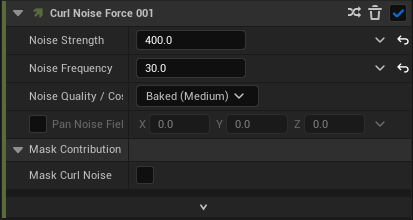
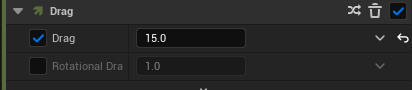
Next, I added a scale sprite size so that the visual effect increase and then decrease in size and also added two curl noise forces with different values for the noise strength and noise frequency as seen below. Curl noise forces create this curl like effect in the visual effect, which initially shoots the particles up all over the place, so to stop that I increased the drag significantly (to about 15) to make it more visually appealing.
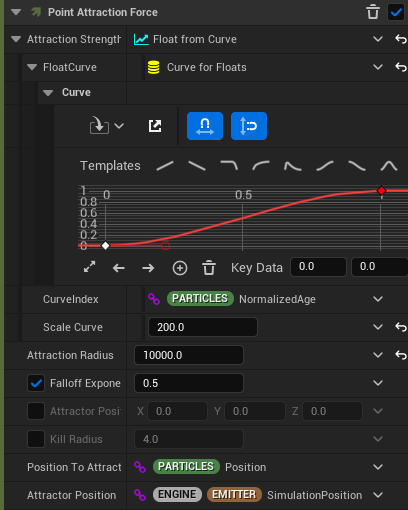
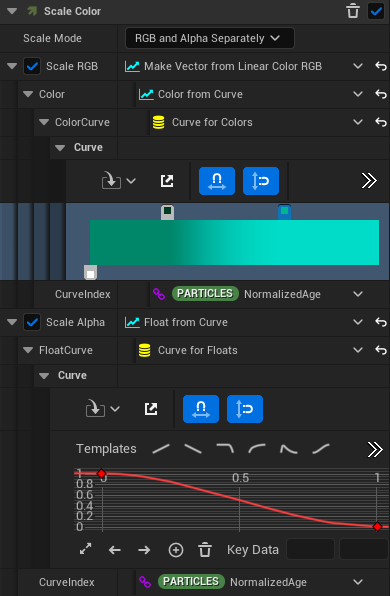
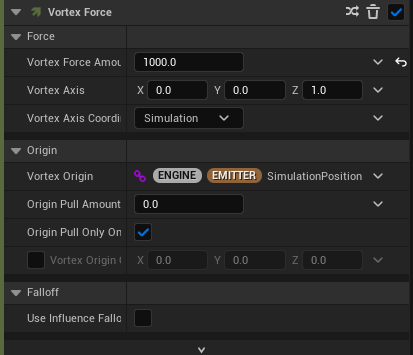
Afterwards, I created a point attraction force to attract the inner portion of the torus shape and added a float curve which gradually increases. I also changed the scale curve to 200 and attraction radius to 10,000 in order to make it look more like a portal than it had previously. The next part of making the portal was to add colour to the particle through the scale colour option. As seen below, I decided to make a linear colour curve so that the colour of the portal would change brighter over time. The final part of making the portal visual effect was to create a vortex force so that the particles would look as though they are part of a vortex, and changing the vortex amount to 1000 to make it more noticeable in the final visual effect.
As seen in the video below, the final product turned out exactly how I wanted it to turn out, with the portal being bright green in colour to make it more visible in the forest environment that I have made for this project.