Maya Export and Substance Painter Setup
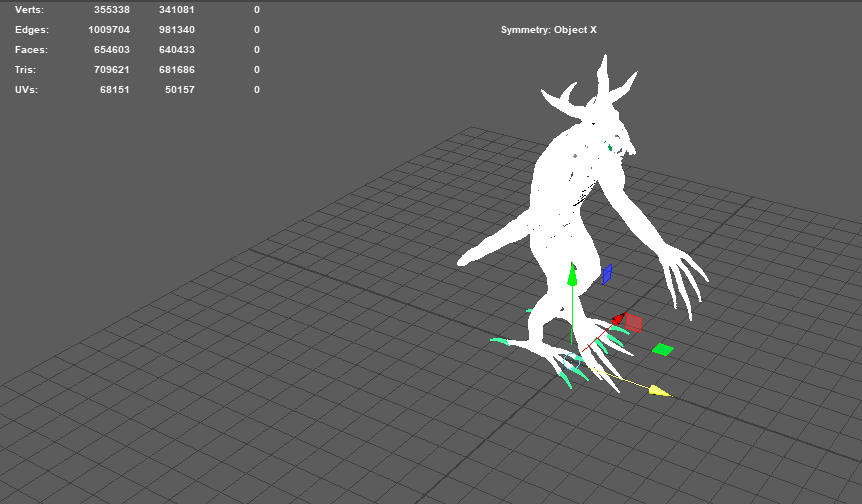
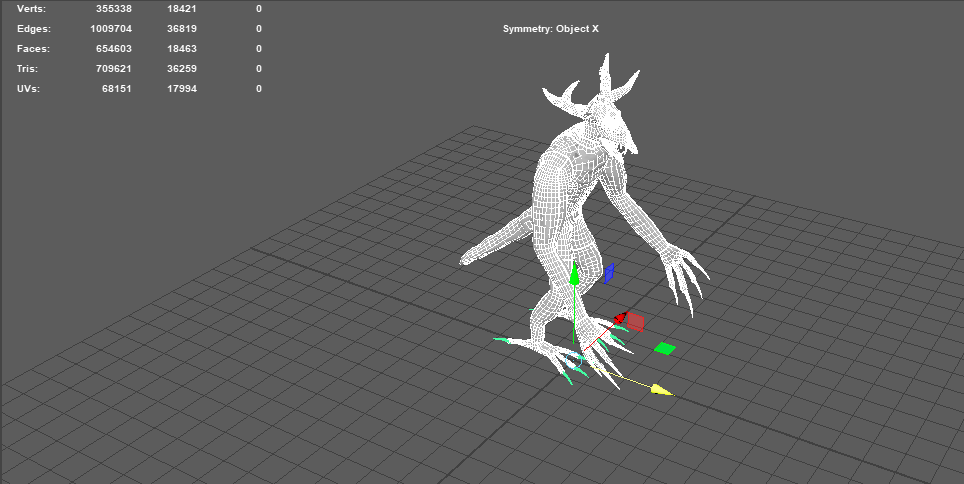
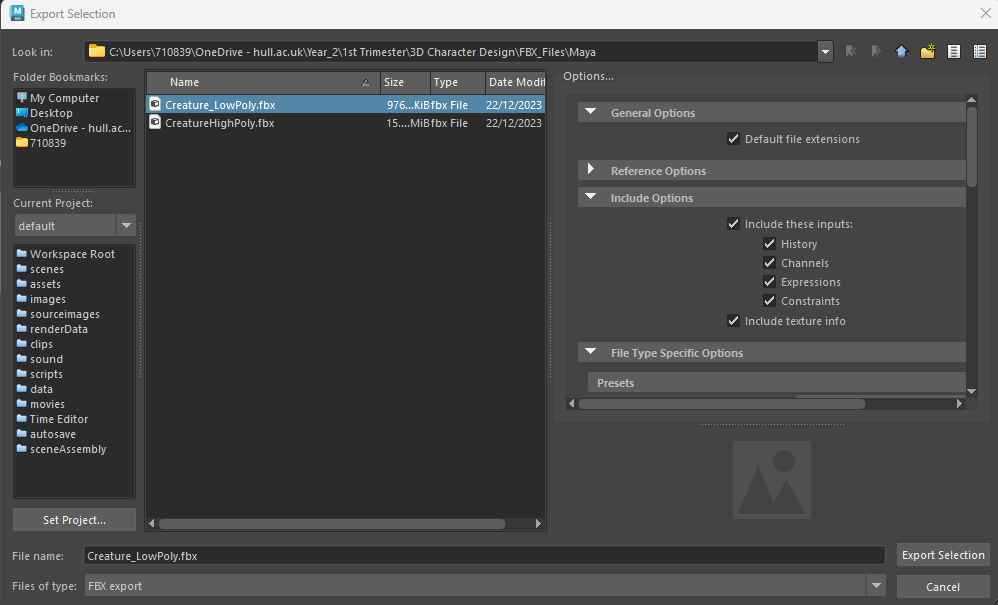
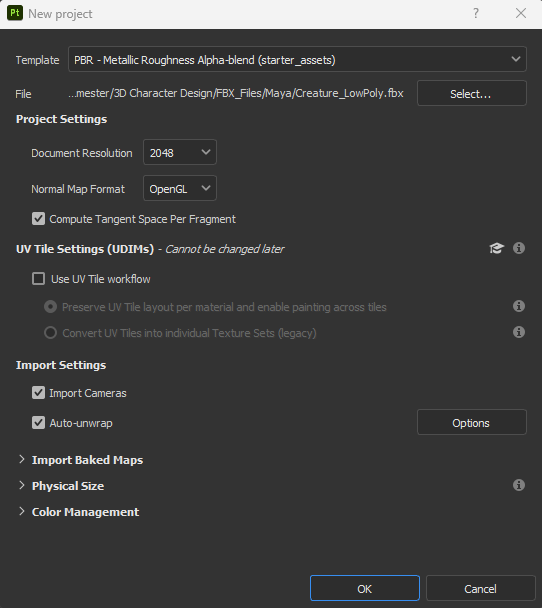
Before I could begin texturing, I had to export both the high poly (asset exported from zbrush earlier) and low poly (retopologised asset) as fbx files from maya, so I selected both separately and exported them as separate files as seen below. In substance painter, I set up the file as the low poly asset since I will be baking the details of the high poly asset onto the low poly asset. I set the template to “PBR -Metallic Roughness”, the document resolution to 2048, the normal map format as “OpenGL”, and ticked the compare tangent per space fragment option before clicking ok to create the project.
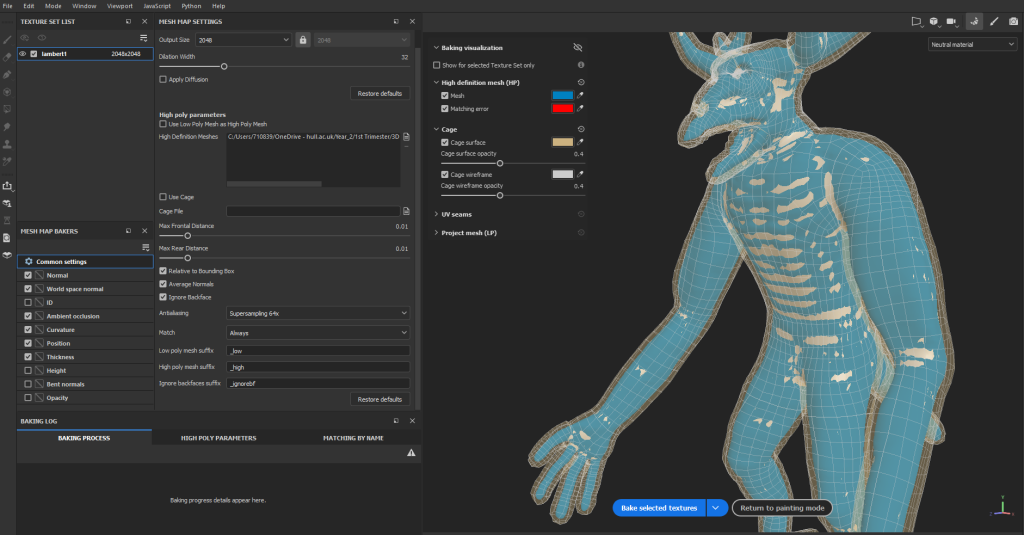
After the substance painter project set up, I went to the baking section to bake in the details from the high poly mesh onto the current low poly mesh, and set the details as seen below, making sure that I have the correct high poly mesh to bake into the low poly mesh. Baking is a process that involves transferring surface data from one 3D model to another 3D model, this method is utilised as it can transfer details of a higher poly mesh to a lower poly mesh whilst keeping the poly count of the affected mesh the same (Conway, 2021). As seen below, the only mesh maps from the high poly map that I transferred were the normal, world space normal, ambient occlusion, curvature, position, and thickness, with the rest being unselected as I did not need them. After that I baked in the selected mesh maps and returned to the main viewport, with the result being ideal.
Texturing process
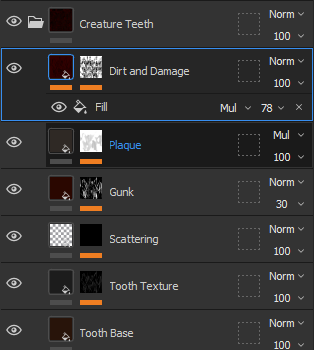
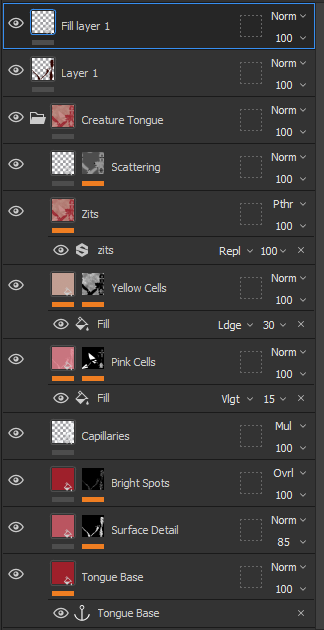
I started off the texture process with the teeth, claws, and tongue. The teeth and claws have the exact same material attached to them, with the base material being a smart material called “creature teeth”, with adjustments that I wanted to make so that it would fit more with the colour scheme of the asset. After that, I textured the tongue, with the base being the creature tongue smart material, with me adjusting the zits and scattering a bit, but I also included a paint layer, which I put the flesh material into so that I would slightly adjust the texture, colour and height of the tongue accordingly, which ended up making the tongue look fleshy and more horror-like. However, I do think that I should have started the teeth and tongue from scratch rather than using already existing templates that are available in substance painter, which I ended up considering when I went to texture the rest of the body later.
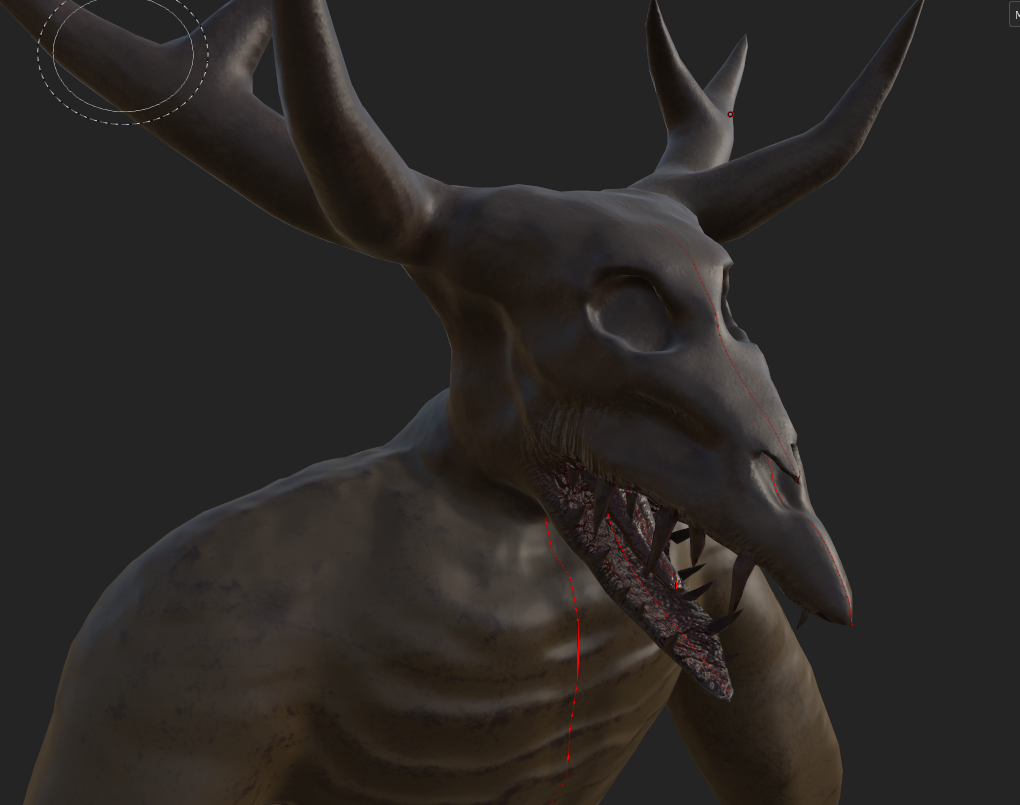
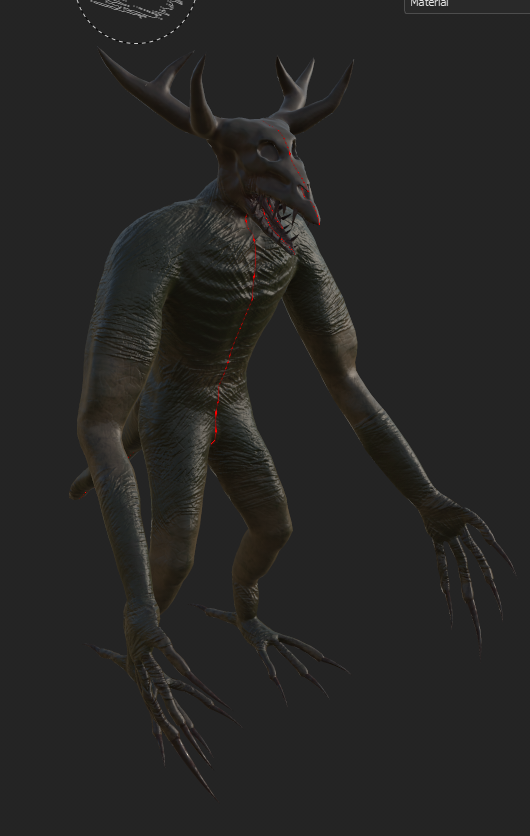
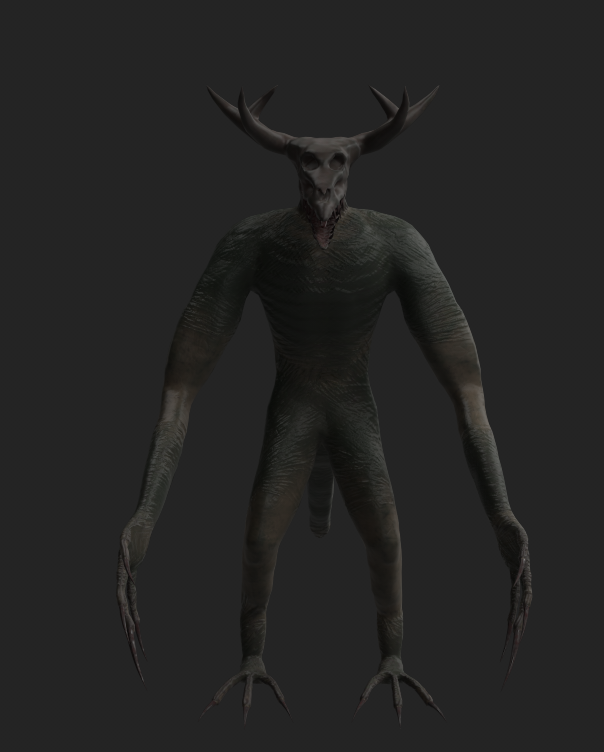
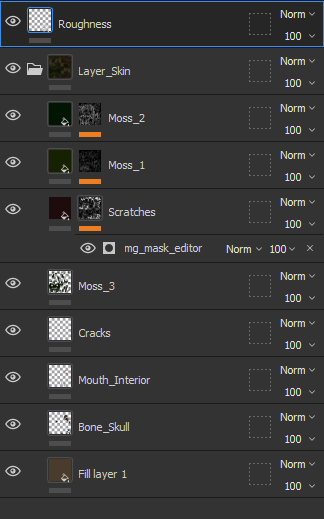
For the main body, I started the texturing by firstly creating the base colour and roughness of the asset, with the fill layer being a brown colour since I wanted to match the colours of the reference image for my character that I made earlier. Afterwards, I added crack details on the skin as seen below, whilst also painting the mouth with a brush that I set with the flesh material to get a similar colour to the tongue. Since the skull was the same colour as the rest of the body, I had to paint on the head with a brush that had the bone material attached to it, whilst I also made sure to adjust the colours according to the design of the character. When I finished doing that, I decided to create a masked layer that contained scratches and dirt to add more skin details to the character and make it look more alive.

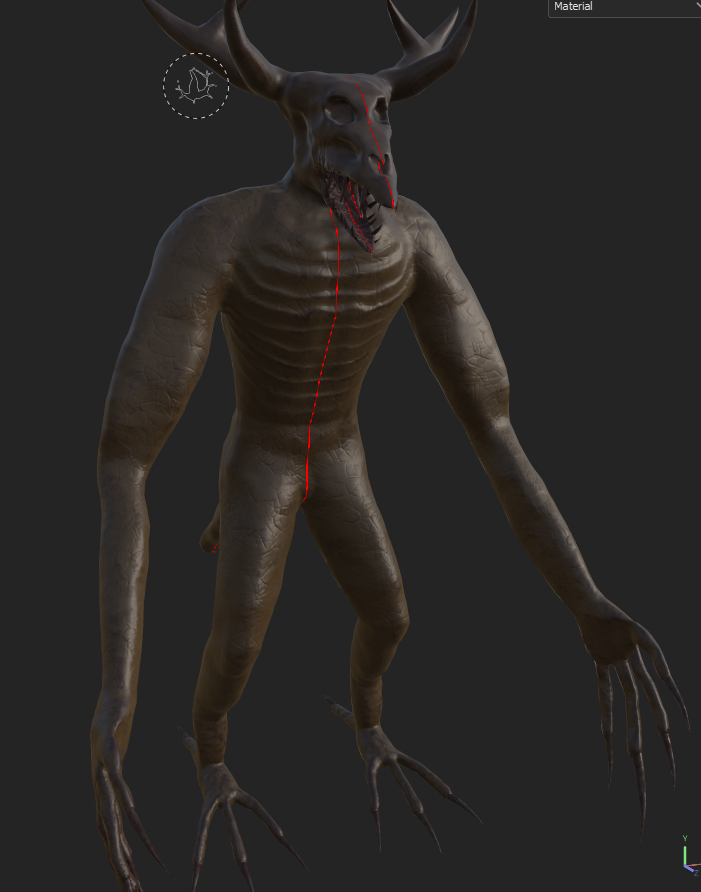
After adding cracks and other details onto the skin, I decided to add two moss layers that were masked onto the model. I did this in the same places as I labelled in the evergreen design of my character, with the moss covering the ankle, chest, wrist, waist, and tail areas of the asset. I painted these on whilst also making sure the height was turned on like for the cracks and mouth interior. It took a bit of time to adjust the asset to make sure that I reached the desired looks that I wanted, after which I saved the project and got ready to export the textures.
Render Process
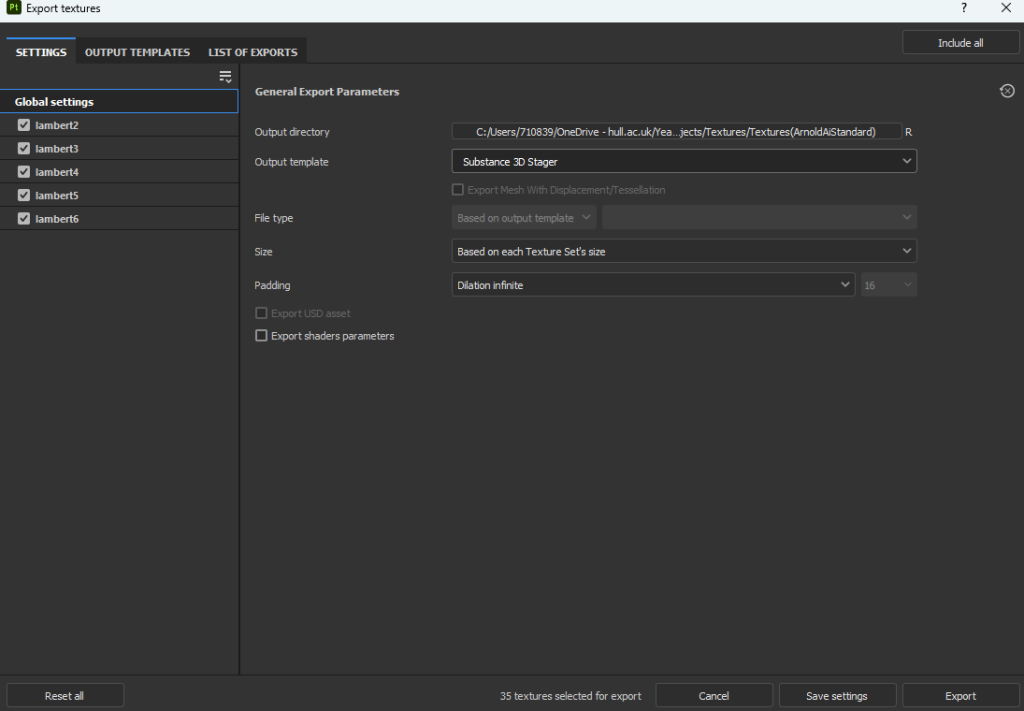
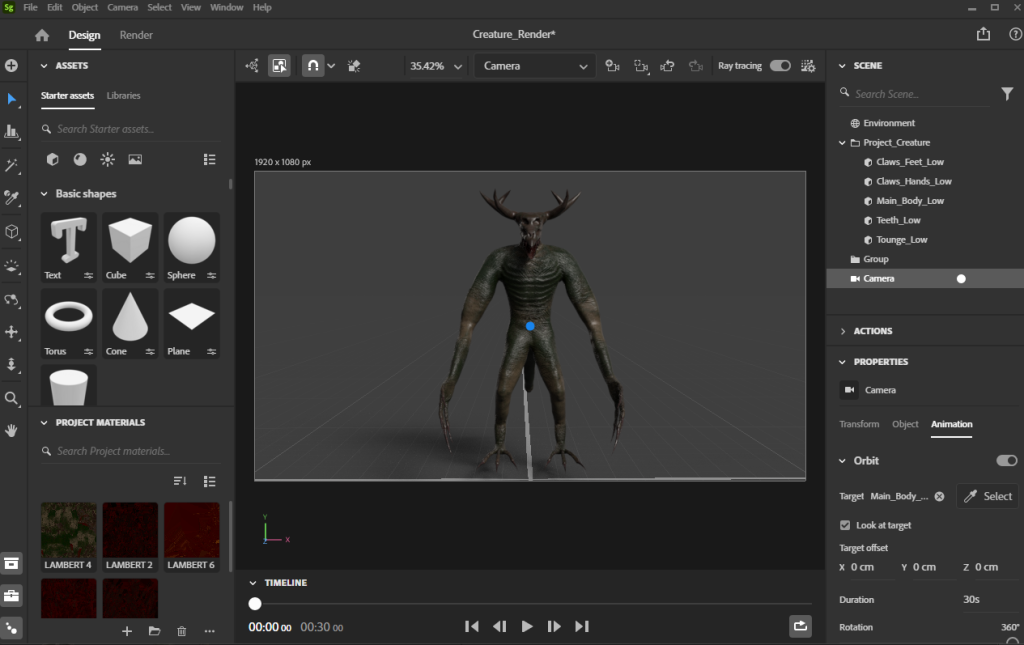
Initially, I exported all my textures as the “Arnold(aiStandard)” template, however when I came to add the textures into Maya it would not work despite having the correct settings on. This prompted me to try out the Adobe Substance Stager turntable instead, as it would be more convenient and less time consuming to do so. The turntable render is a new feature in substance stager, which allows you render a turntable for the selected 3D model. So, I exported the textures and the asset from substance painter and imported them into substance stager. I made sure to set up the render so that it would turn 360 degrees around the asset. This process was straight forward as I had to select the object that the camera could orbit, the length of the video and the number of frames per second. My only regret on the rendering stage was that I did not take time to adjust lighting accordingly, due to the stress caused by the problem that I had with Maya, so I might consider that in future projects.