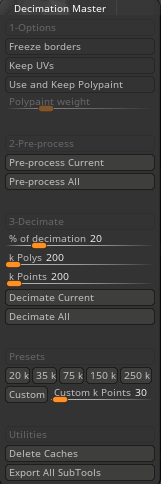
Before I start to retopologise, I need to export my character sculpt from zbrush into maya. Since maya is the software that I will be using for retopology, it is important to export my file correctly. Maya cannot work properly if the mesh I export has more than 500 thousand polys (2d shapes). The first thing I did was to pre-process my mesh in decimation master before decimating it. Decimation is a process which involves simplifying the details on the mesh without changing it much, this results in the formation of a lot of triangles on the mesh (Conway, 2022). Decimation is important as it reduces the size of the file by reducing the number of vertices, edges, and shapes that the model is comprised of, which is useful for transferring the file from one computer to another and reduces render time. Zbrush allows me to choose the number of shapes/polys that my 3d model has, which is especially useful for me as I can set the poly/shape count to less than 500 thousand. After that I exported every major component of my mesh as fbx files so that they are compatible with maya, so I went to the fbx export/import drop down on zbrush and chose select and export.

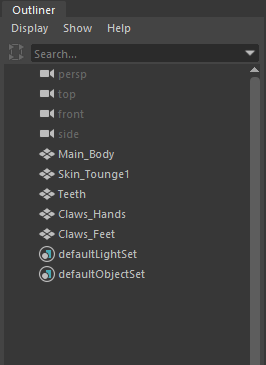
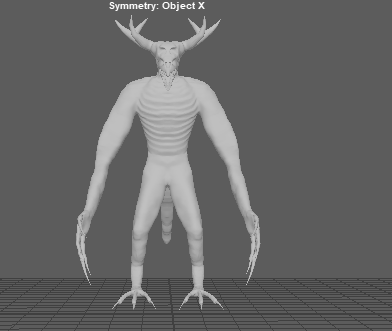
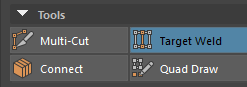
When I finished doing that, I booted up maya and imported all components of my 3d model as displayed in the outliner below, then I set the components in the correct positions and whilst selecting “Main_Body” on the outliner, I set up the symmetry to “Object X”. This will set up the symmetry to the selected part of the mesh, which is the aforementioned “Main_Body”. Then I went to the tools and selected the Quad Draw tool, which will be important for the retopology process.

To summarise what retopology is, it’s a process that simplifies the topology of a mesh to make it easier to work with, this can either be done manually or automatically (Blender, n.d.). This is especially a must for me as I was sculpting my mesh, which leads to unclean topology. In my case, as I mentioned, I will be using the quad draw tool which is a manual way of retopologising a mesh by covering the surface of the mesh with four-sided shapes. When starting to retopologise, it’s important to make sure that I have good edge loops on my mesh. Edge loops are a set of edges that are connected and flow in a singular line across a mesh (Anon, 2023).
Retopology Process
Head
The first parts of the mesh that I started to retopologise were the eye sockets and the nose, as seen below, and I started by creating the overall edge loop for each section which I expanded upon as I went through the process (to create the quads I have to left click to the surface to create a vertex and then press shift + left click in order to create the quad). This leads to uneven surfacing of the mesh, so I used the shift + left/middle mouse keys to relax the quads out a bit. I also kept toggling the b key since I wanted to know whether bits of the mesh still needed to be relaxed or not. I continued with this process on the head, adding edge loops on the mouth and around the face neck and head, whilst also making sure that the shapes and edges were not outstretched in the process. Since the antlers needed to have different edge loops, I decided to leave them for the time being and come back to retopologise them later.


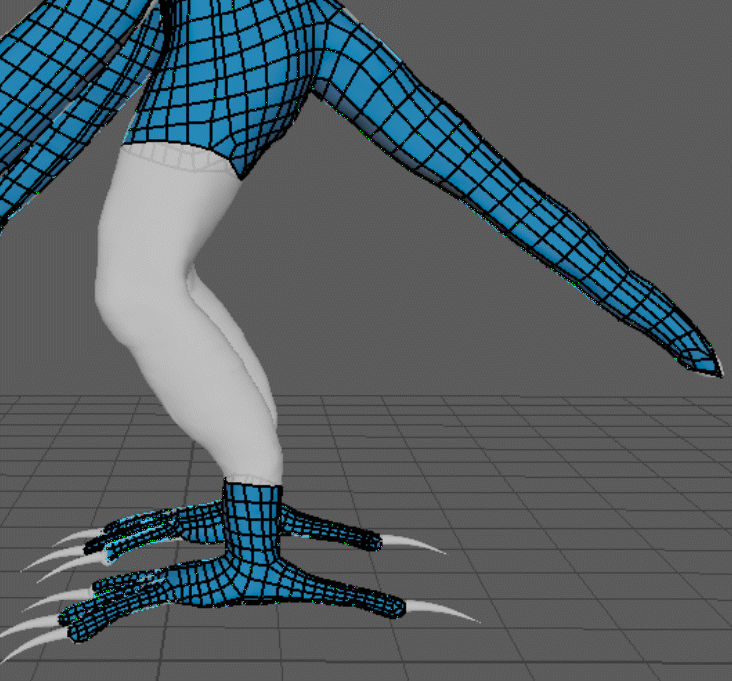
Legs, Waist and Tail
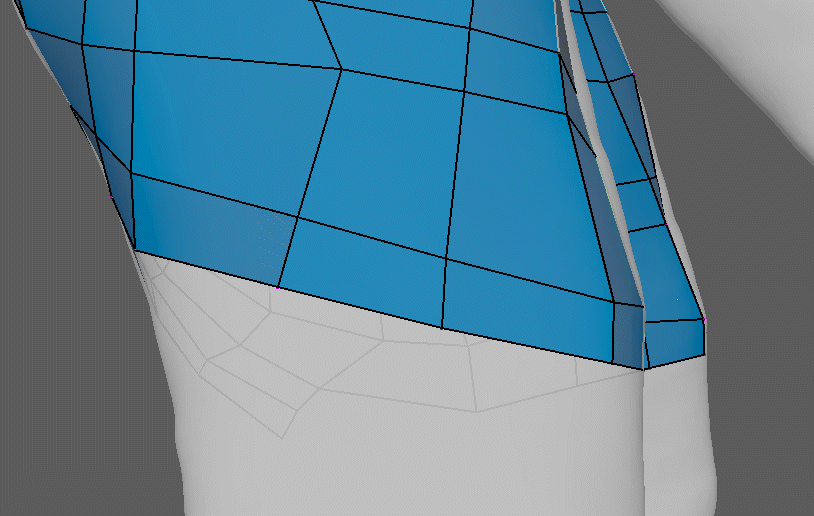
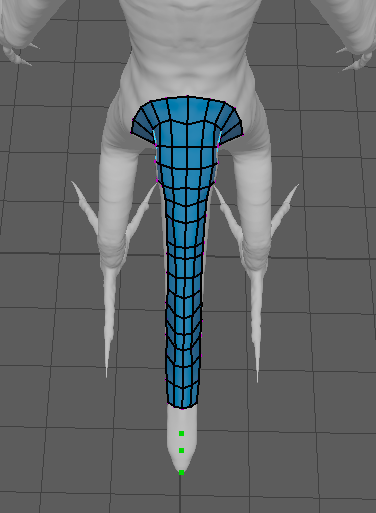
For the retopology of the legs and tail, I made circular edge loops around them as seen below and relaxed the quads out by using the shift + middle mouse button keys as mentioned in the head retopology. I had to be careful around the waist, as I did not want to connect the edge loops around the torso area with the other areas, so the quads in between these edge loops looked quite awkward as seen on the bottom right image.
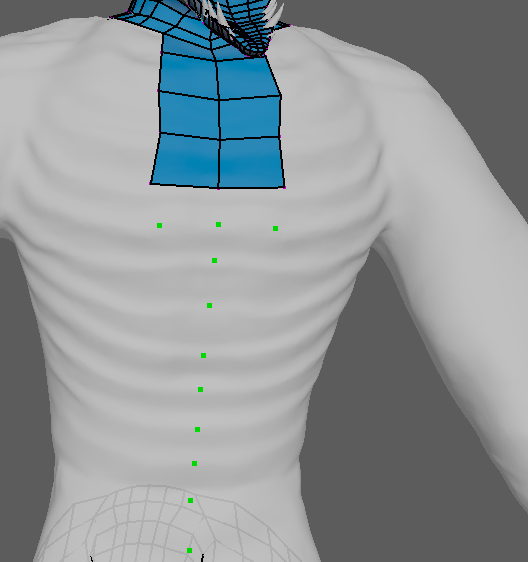
Chest
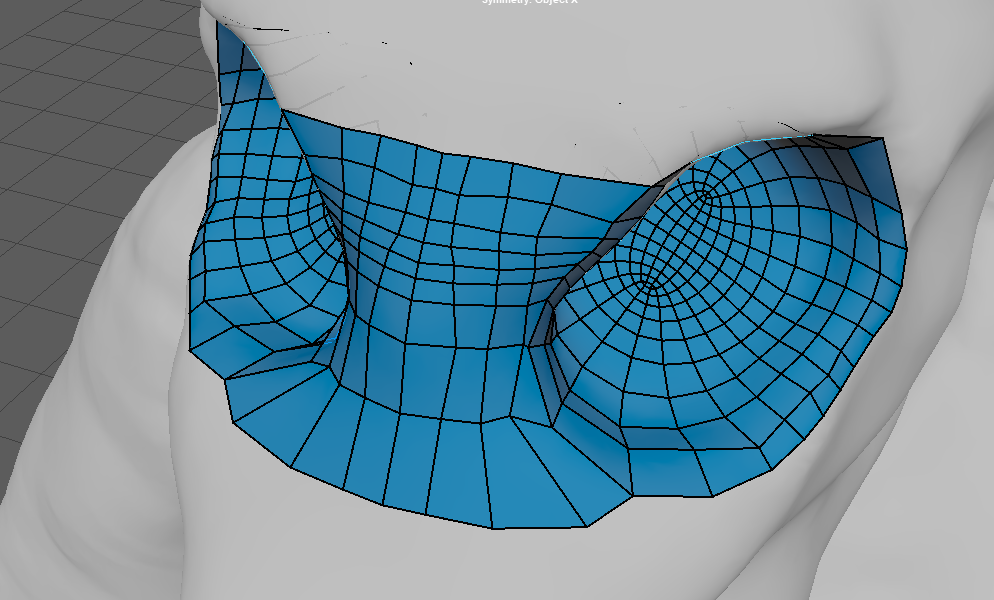
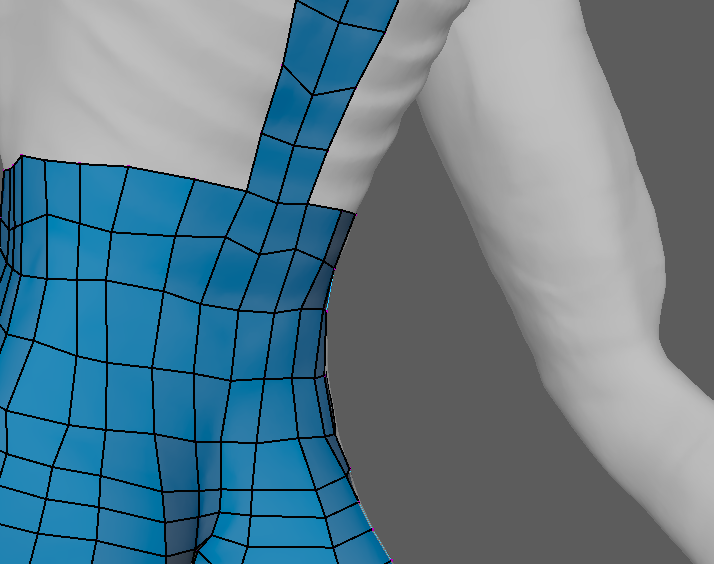
The chest/torso of the character was by far the easiest part to retopologise, as it’s a much larger surface than the arms or the legs. This made it easier to draw in quads and apply edge loops where appropriate, so I started with the hips and waist and gradually went up the asset as seen below. After that, I relaxed the quads to make sure that they are more evenly spaced out across the torso using the same tool described earlier.

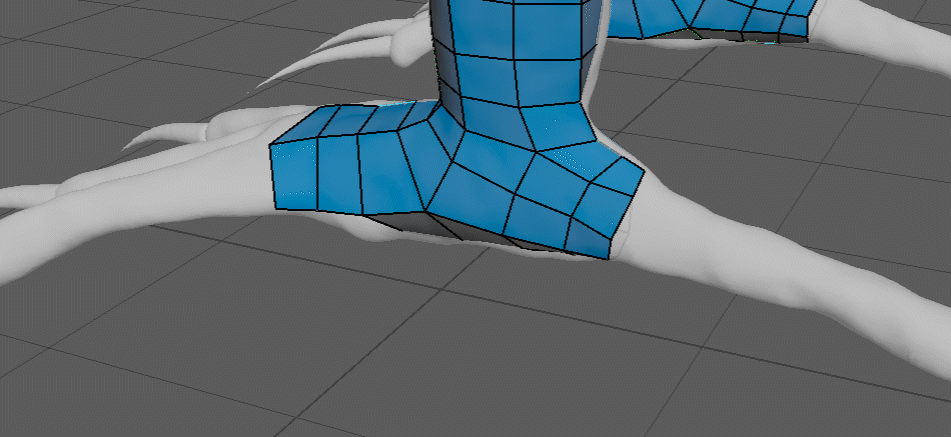
Leg improvements and Arms
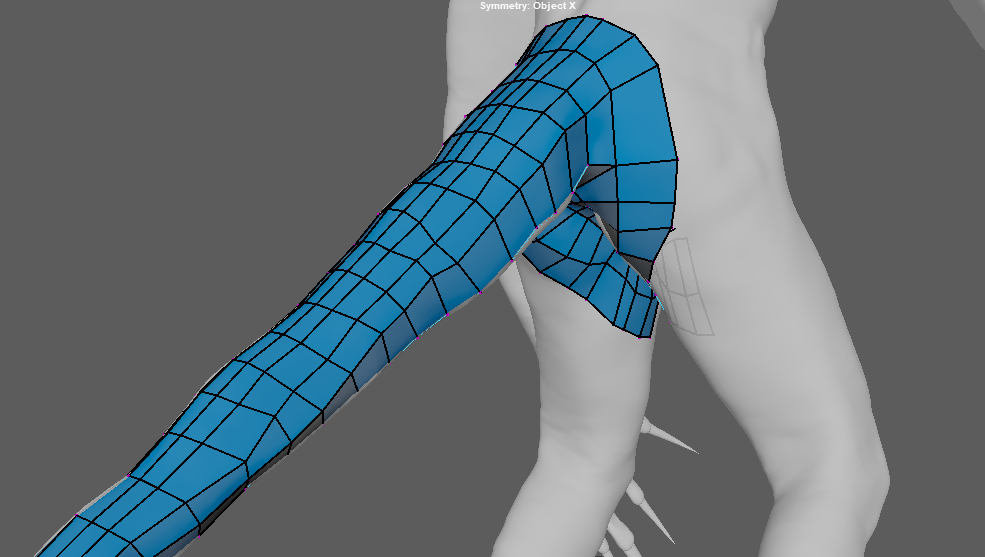
After doing the retopology on the chest, I went on to retopologise the arms. This process was like the process I did on the legs, which involved creating circular edge loops around the arms. Like with the legs and tail, I had to be careful of the edge loops around the torso area as I wanted to make the arm loops separate from the chest edge loops, so it took me a while to adjust the shoulder area so that it flowed nicely. After I have done with the arm retopology, I noticed that the edge loops on the legs of my character were not right, I had to redo them from the waist to the ankle as seen in the gif on the bottom right.

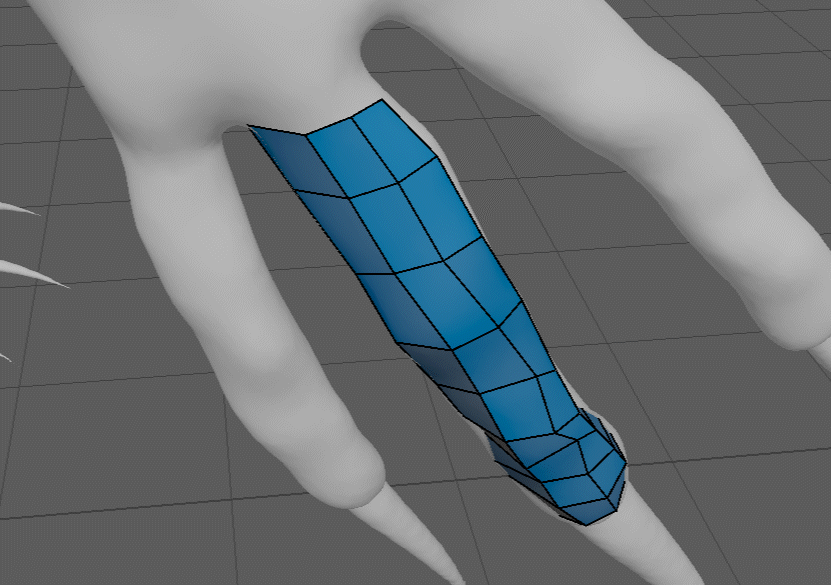
Hands, Feet and Antlers
After finishing with the leg and arm retopology, I turned my attention to retopologising the hands and feet, starting from the finger and toes respectively. This process was like the retopology of the arms and legs, but on a much smaller scale so I had to be more cautious to make sure that the fingers and toes had smooth edge loops. After that the rest of the hands and feet were filled in, with this part being the hardest part in this whole process as I had to make sure that the edge flows of hands and feet flowed with the rest of the respective limbs, which took a lot of adjustment. Eventually, I managed to finish this by making sure that the quads were evenly spaced out on each digit by relaxing them.
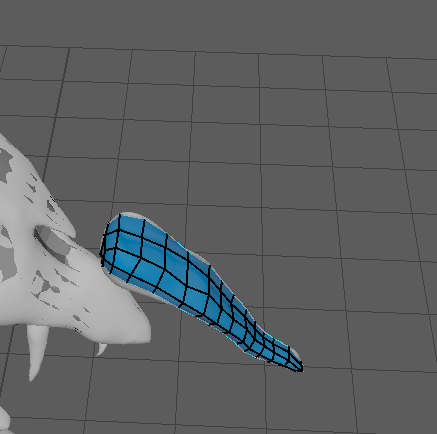
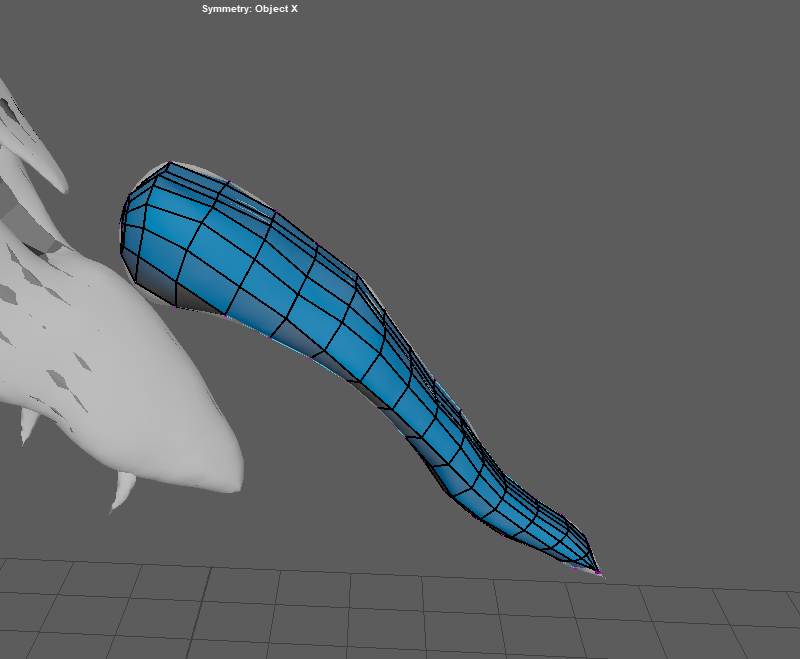
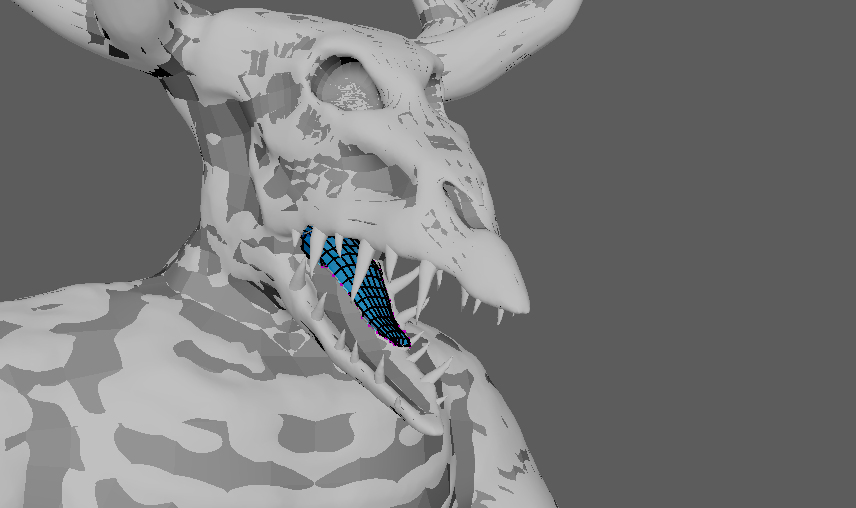
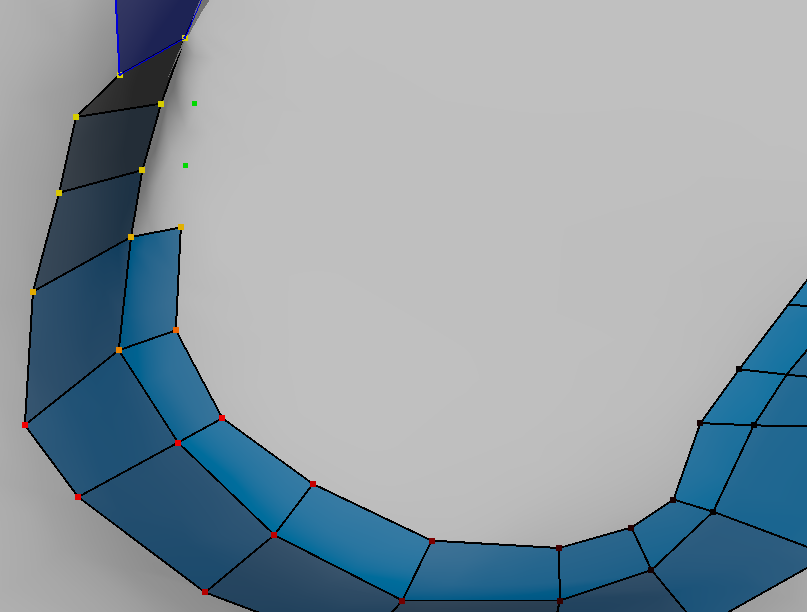
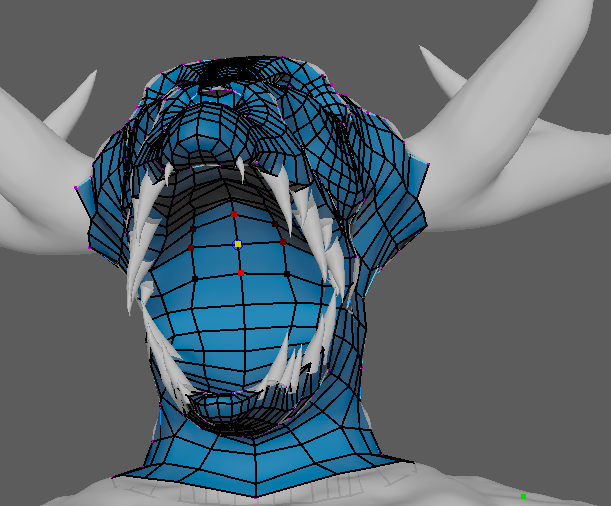
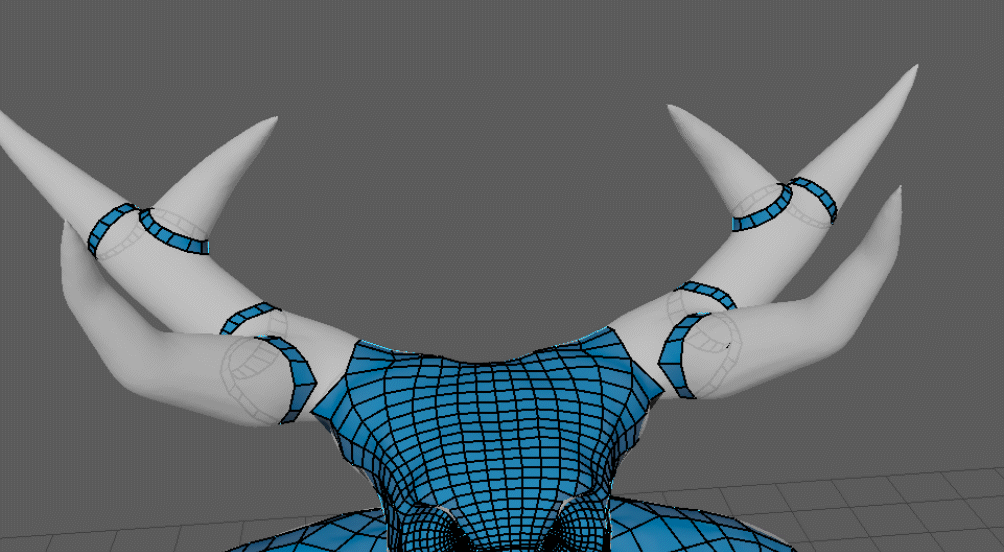
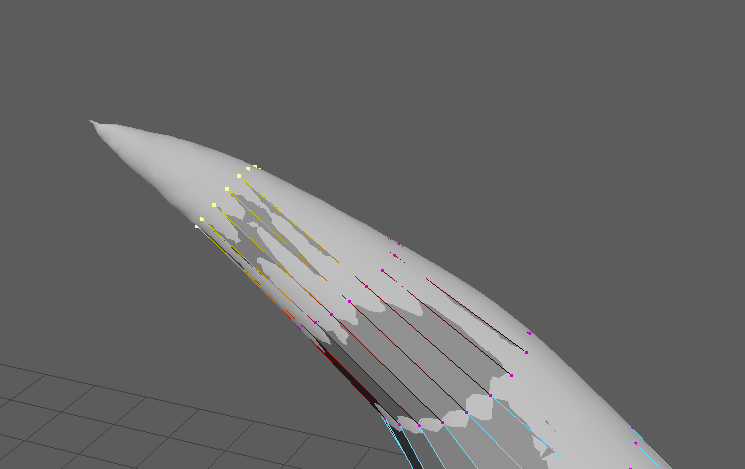
The last part of the retopology process involved the claws, teeth, antlers, and tongue, with the antlers, claws, and teeth having a similar process. As can be seen in the gif below, I started the process of the antlers by identifying the edge loop on each tip, and then filling out in between those sections. Once I got near the tips, I just created a ring of quads, selected the vertices nearest to the tip and make them into one using the target weld tool. This process was repeated for each tip of the antlers, teeth and claws, which then the tip would be adjusted to the right place by returning to the quad draw tool.
Below is the process I used to retopologise the tongue. Thankfully, since the tongue was a separate shape, it was easier to work with, but was still hard to fit in the quads at the tip of the tongue, which ended up being time consuming, especially when relaxing the surface. I dealt with this by deleting faulty edge loops/ quads and made quads that complemented the edge flow of the tongue.