Lighting
In Unreal Engine, there are a variety of lights that I could choose from, which include the spot light, rect light, point light and directional light. Each of these are used for different purposes but all of them have options of changing the colour, intensity, shading and temperature.
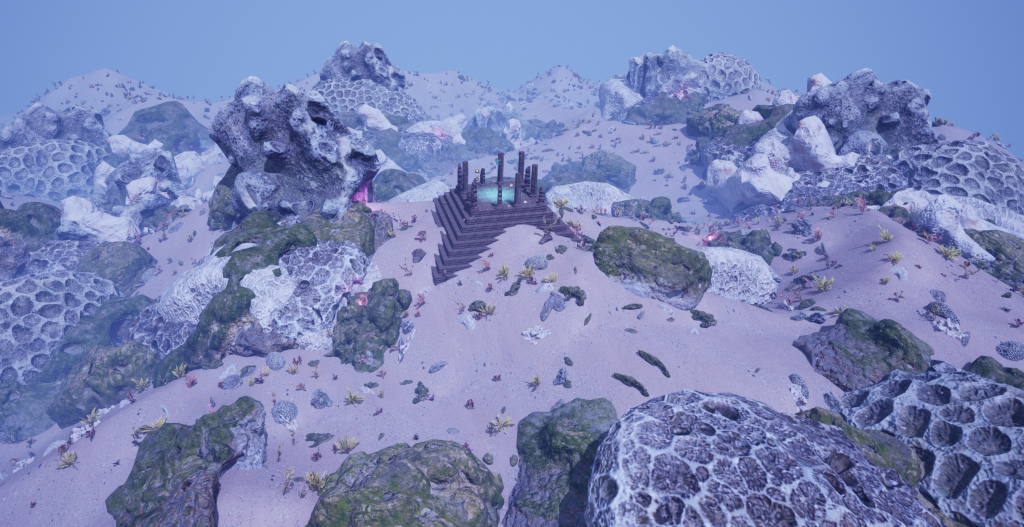
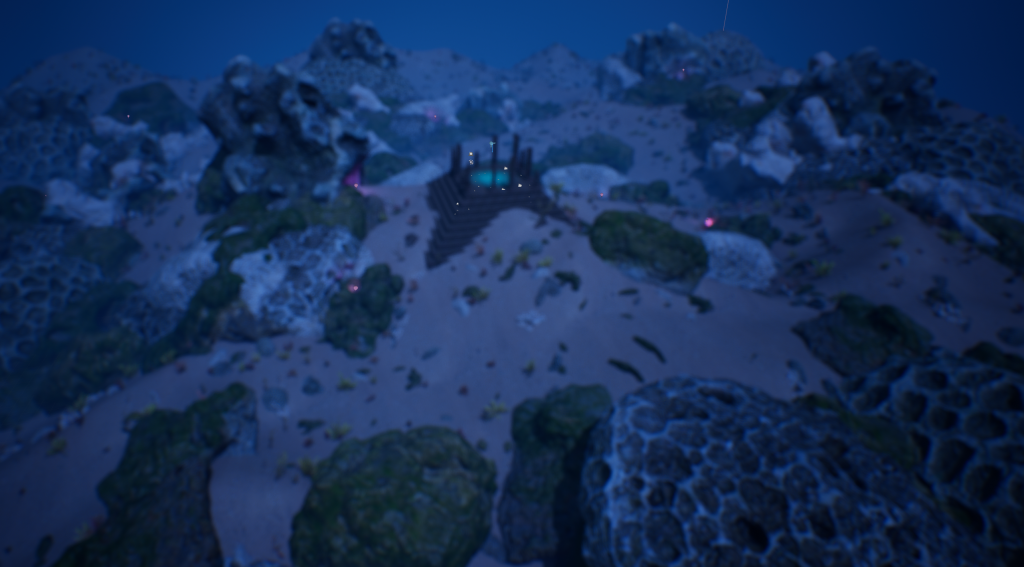
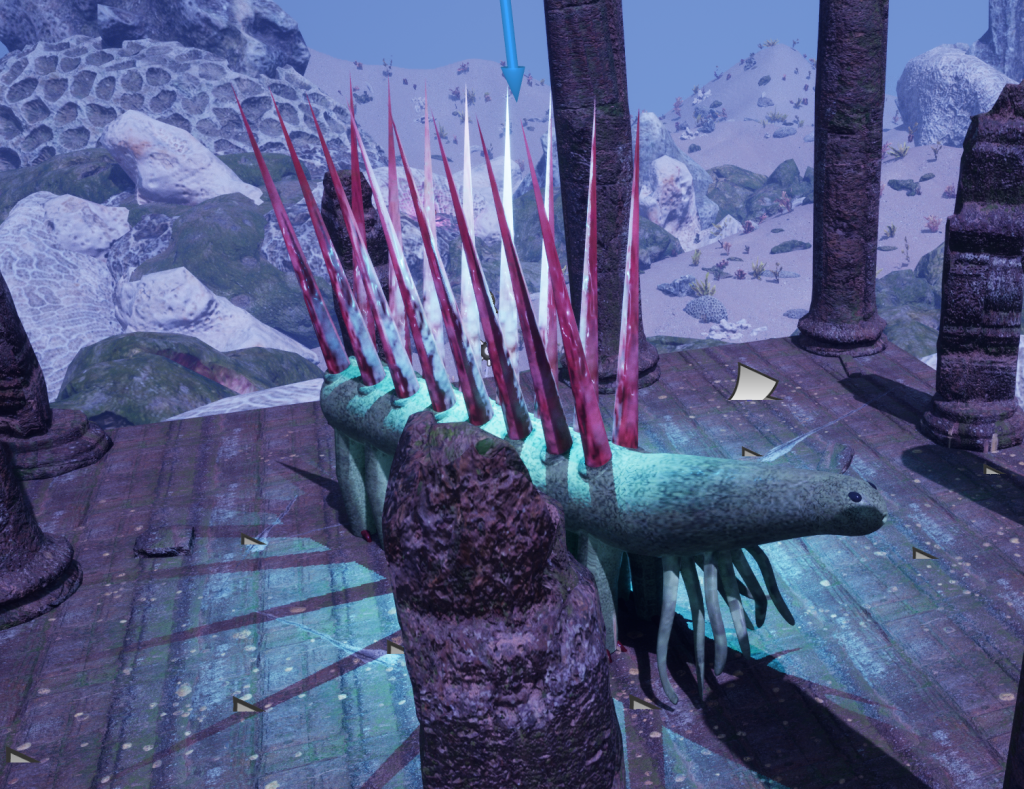
For my environment I decided to use a few point lights, a spot light and a directional light. I changed the temperature of all those lights to a cold temperature, since I wanted to keep to a cold colour scheme (combination of blues, greens and purples) with only a few exceptions to this rule. I just changed up the angle of the directional light and slightly change it’s colour to a light purple-blue, to give the environment a more alien like premise to it. For the point lights, I made them a bright purple/magenta to show that the place is more alive and blooming, and this is mainly inspired by an object called “brightmoss”, which is found in Monster Hunter World’s Coral Highlands environment. I duplicated the point lights and placed them in darkened holes that were in between and/or inside the large corals, I did this as I did not want to place these lights in totally random places, where they would not be able to blend in the overall feel of the environment.
I added in a spot light on the temple that I created, as I wanted this light to focus on my Hallucigenia model in the middle of the temple, as a subtle clue as to what happened to the civilisation that once resided near the ancient temple. I decided to make this light a cyan colour as it makes area that is lit up around it stand out more in comparison the the rest of the colour scheme.
Post Process

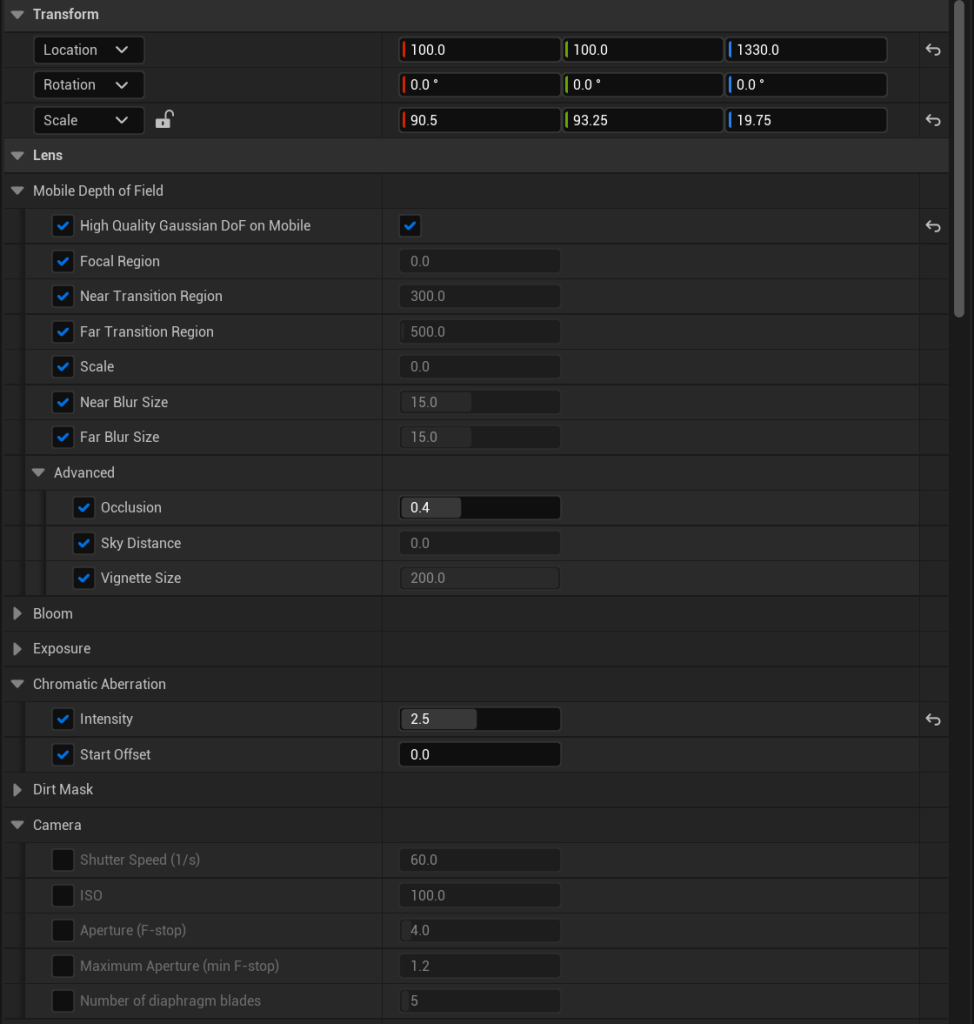
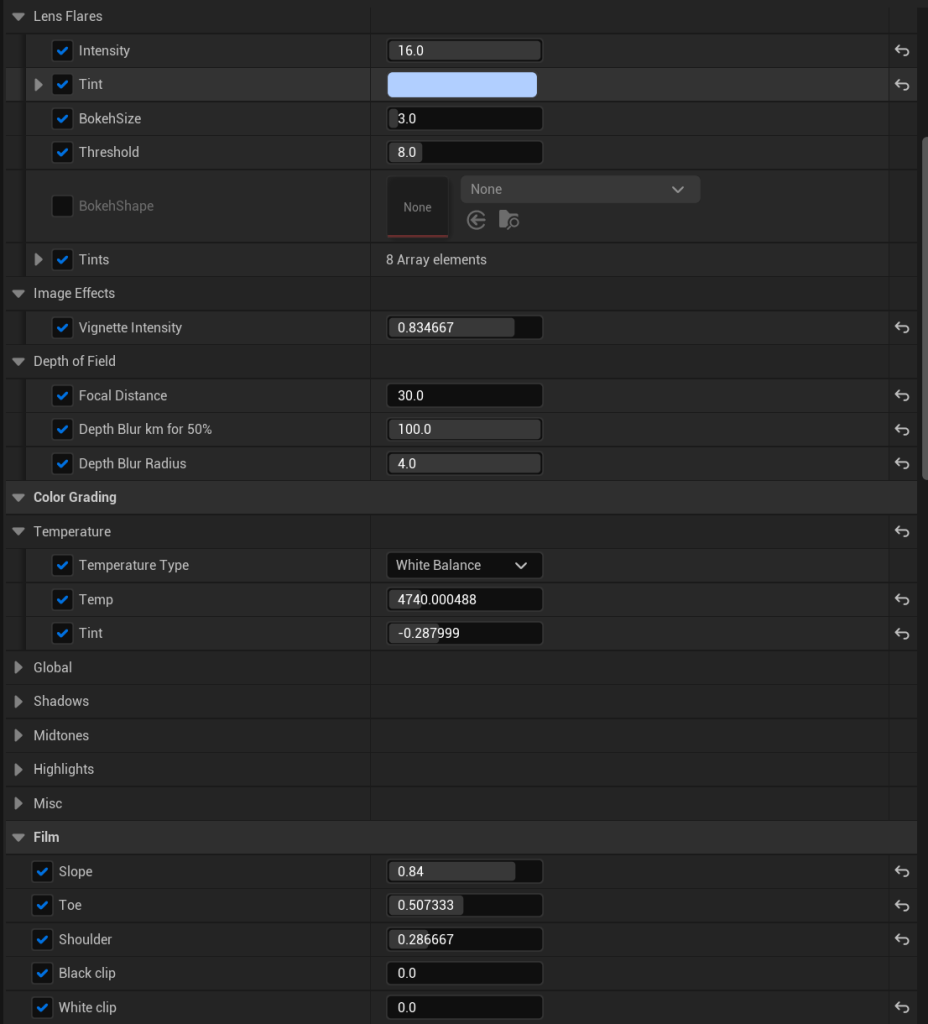
To finalise the making of my environment, I decided to include some post process effects to make it look as though it is under water. I did this through using the post process volume actor that I got from the place actors menu, and with that actor I’m allowed to manipulate certain elements, like blur, temperature and colour. However, the main options that I manipulated were the chromatic aberration, film grain temperature, exposure, depth of field and post process volume settings. Overall, it worked really well in making the environment look more like it was underwater. However, it may have been more beneficial to me to use water mod which allows me to use water like substances in my environment but at the same time, it costs quite a lot of time to manipulate the water in the way in which I want it to (mainly due to physics).