In this week, I continued learning about the 12 principles of animation and learned the bone rigging animation technique in unity. This week we covered the rest of the 12 principles of animation which included arcs, secondary action, slow in/slow out, timing, exaggeration, appeal and solid drawing.
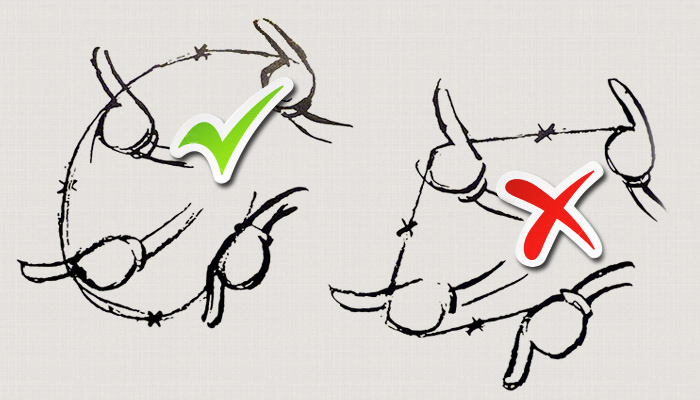
Arcs
Arcs are a very important principle in animation, and that is because of things rarely ever moving in sharp angles in reality. For example, when moving an arm it does not move straight, but rather in an arc like trajectory. The reason as to why arc are used is because they create a smooth animation compared to animations that move a character in sharp angles, as the animator would want the character to look as alive as possible. Also, gravity, drag and mass all have a significant impact on an arcs trajectory and are well worth considering when animating a character.
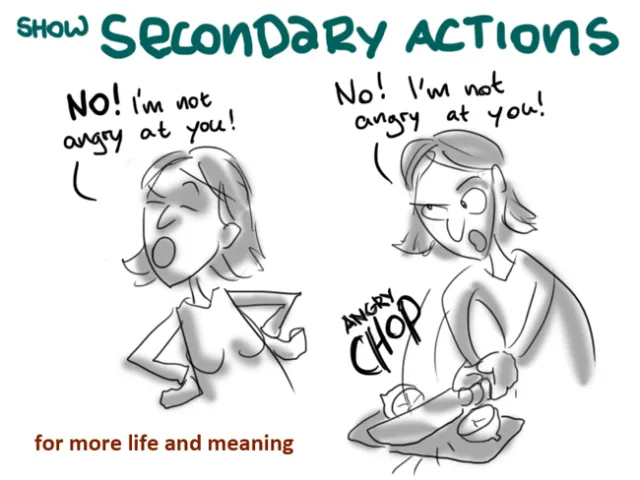
Secondary Action
Secondary action is a separate action from the primary action, but it’s used to compliment that primary action. This is not to be confused with overlapping action as that is an action that happens just as an aftermath of the primary action whilst secondary action enhances the primary action without taking over it. Secondary action can be used with the head, face, arms and hands.
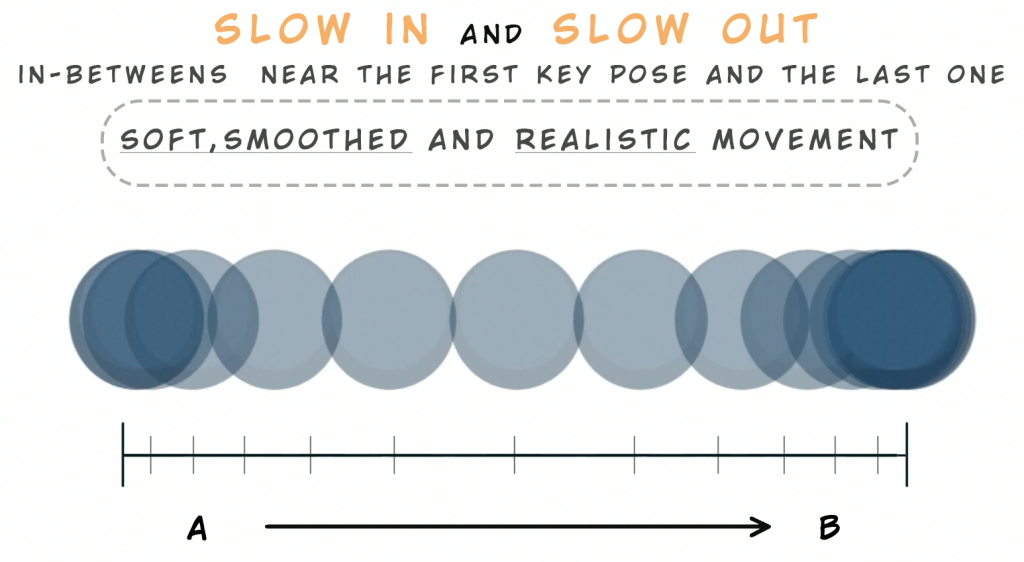
Slow In, Slow Out
Slow in, slow out is basically a rule that refers to most movement starting and ending slowly, there are exceptions to this rule such as a car crashing into something (as it would end suddenly) but mostly this rule is followed in most animations. The reason for this rule is simple, in reality things do not instantly reach their top speeds when they start an action and mostly have a small period of time before they come to a complete halt. This principle, like with any other principle can be used in combination with other principles, such as arcs, overlapping action/follow through and timing.
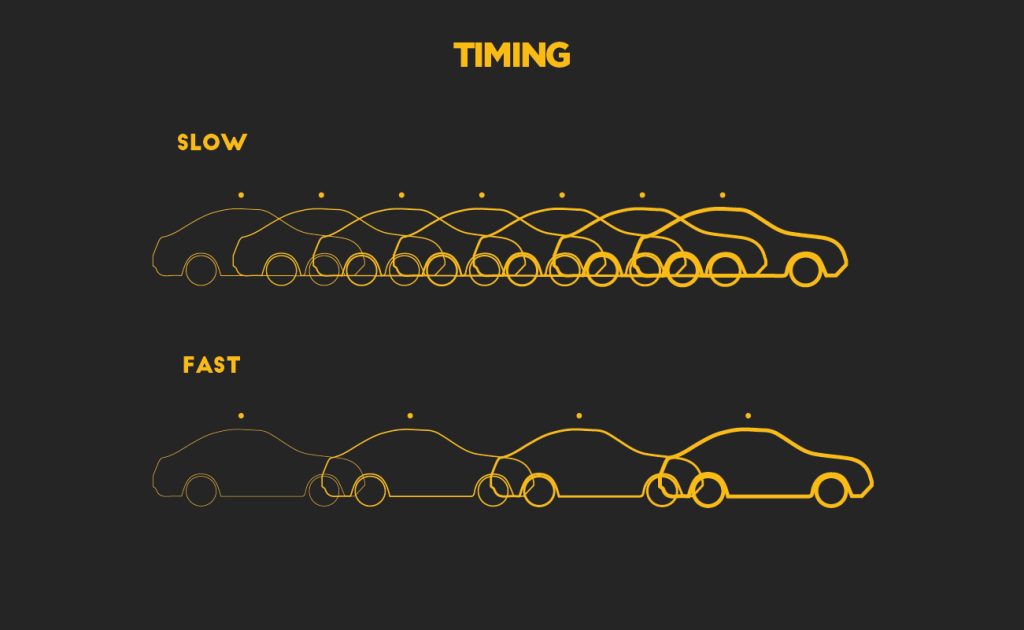
Timing
Timing, in the most simple definition, is the speed at which something moves and how long it stays still. This principle is closely linked to the slow in slow out principle like mentioned before and is also very closely related to real world physics. The other principles this can be used in combination with include pose to pose and straight ahead, as something that has more frames would be slower while something that has less frames would be faster. However, this is easier with pose to pose than with straight ahead as you would have more flexibility with adjusting your frames.
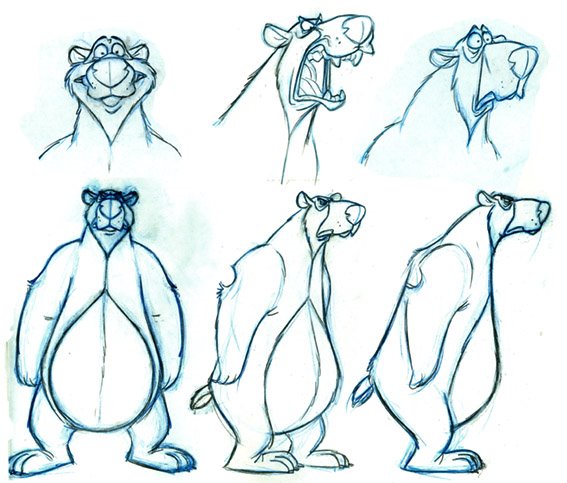
Solid Drawing
Solid drawing is a principle that is used to control the construction and form of a drawing and is used with various techniques, including perspective. Solid drawing also needs to show that something has weight, balance and volume. However, it is also important to avoid twinning (making a pose more symmetrical) when thinking about solid drawing as it can make characters robotic, stiff and less life like. The technique of straights vs curves can help with solid drawing a lot as it helps the animation be asymmetrical and therefore more organic.
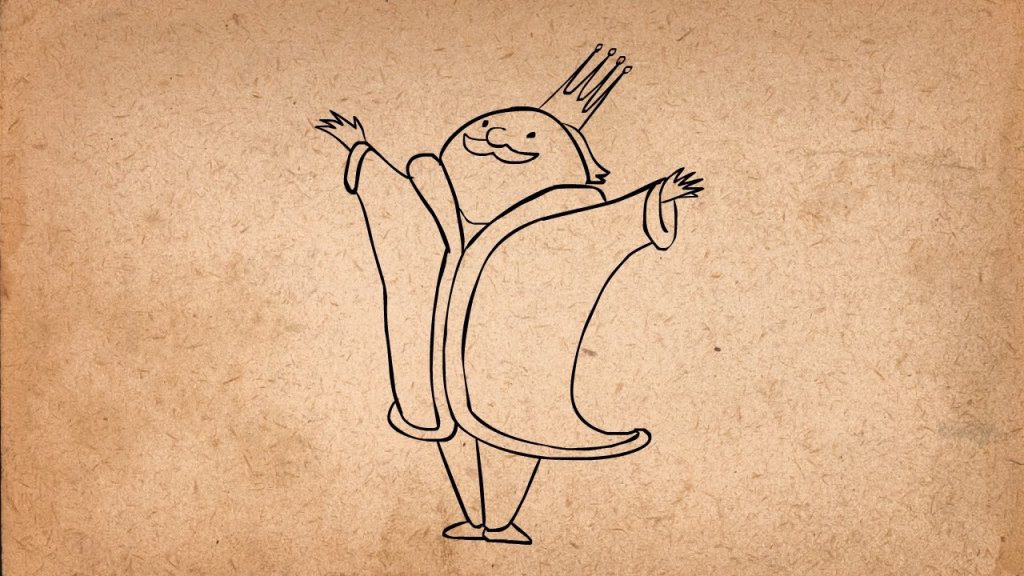
Appeal
Appeal is a principle that refers more to the characters design rather than the animation itself and it basically mentions how the key characters should have unique, appealing and interesting designs for the viewer and/or player. Shape theory, proportion and simplicity are all techniques that closely relate to this principle.
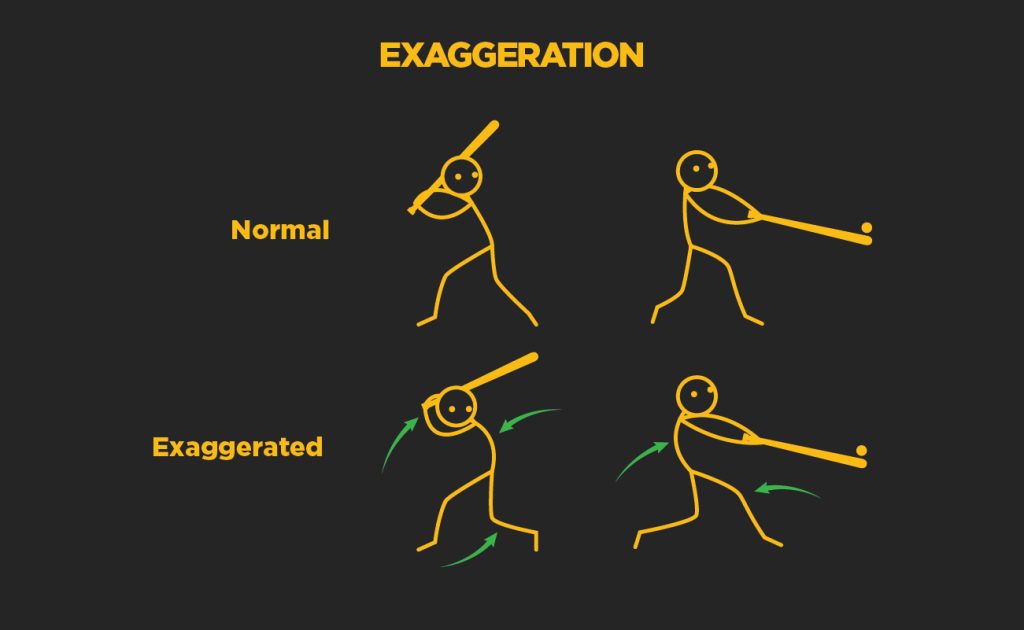
Exaggeration
Exaggeration basically refers to the frames of an animation, more specifically the poses of character within the frames. Frames are only seen for a split moment, but exaggerating some of these frames is good practice as not only does it make the animation more readable, but it also makes the animation look interesting and life like. The way in which this can be achieved is through pushing a pose until it starts to break (look slightly unrealistic), or push it even further than that and then take a step back for nice exaggeration. This principle can be applied to almost all of the other principles including squash and stretch, arcs, timing, appeal, solid drawing and anticipation.
Bone Rigging Animation Process
For this week, I was tasked with completing an animation using bone rigging in unity. So I started off by downloading the blue ninja sprite from a photoshop document and opening up unity. I set up unity in the way I wanted to and uploaded the blue ninja sprite into the sprites folder that I created in the assets tab. I also created an animation tab and an animation folder in the assets tab to create and contain all of the animations I would have to create later on.

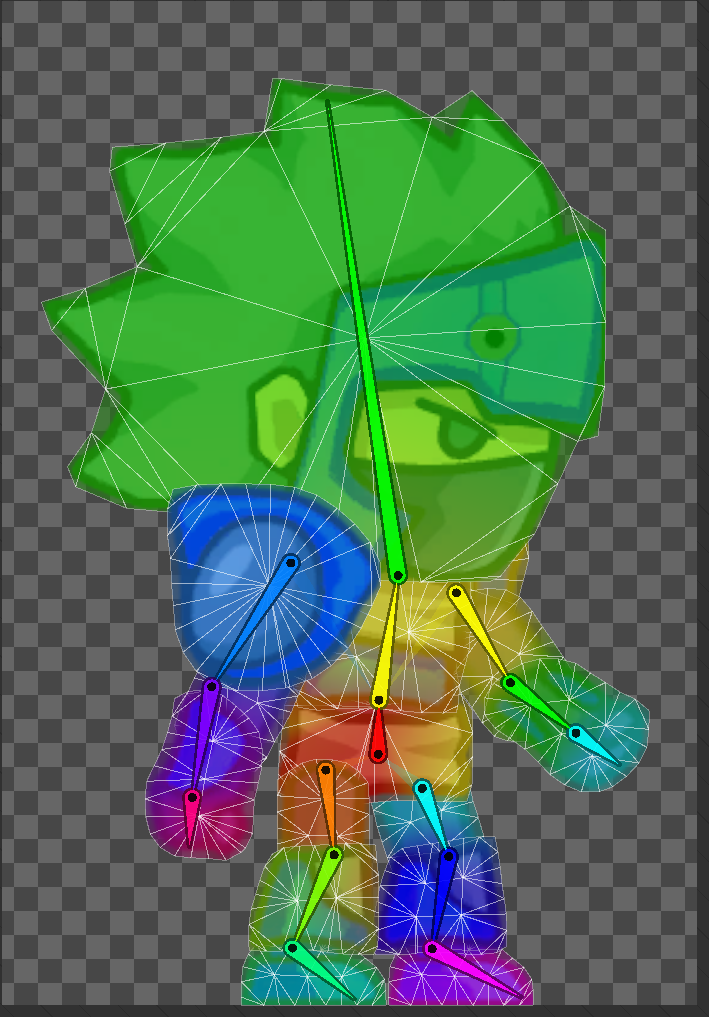
After I sorted all of that out, I clicked on the sprite editor of the blue ninja sprite and selected skinning editor on the top left. The reason as to why I selected the skinning editor was because I would have to create bones for the bone rigging animation. The bones on the skinning editor allows me create new bones and edit them if I need to. I started by creating a root bone that can control all of the other bones, which would be the red bone located on the waist and created more bones for the head, chest, lower legs, upper legs, feet, hands, lower arms and upper arms whilst also naming them appropriately in the process.

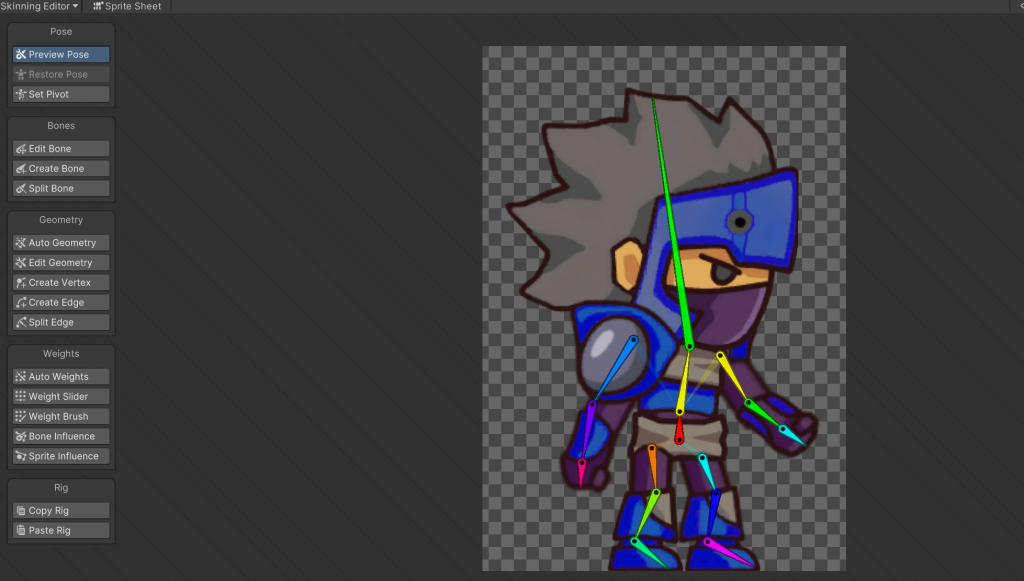
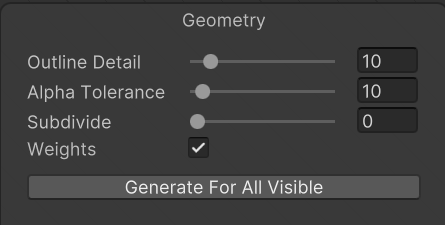
The geometry allows me to control the parts of the sprite that are to be influenced by an individual bone. Auto geometry automatically creates geometry for the sprite, but I had to adjust mine a bit so other body parts would not be influenced by a specific bone (like the head bone influencing the movement of the chest for instance). The diagram on the bottom left is basically an options tab for the geometry, like whether the bones would have weights and the amount of alpha tolerance and outline detail it will have. This tab also allows me to automatically generate the geometry for all visible bones after I have made these adjustments.
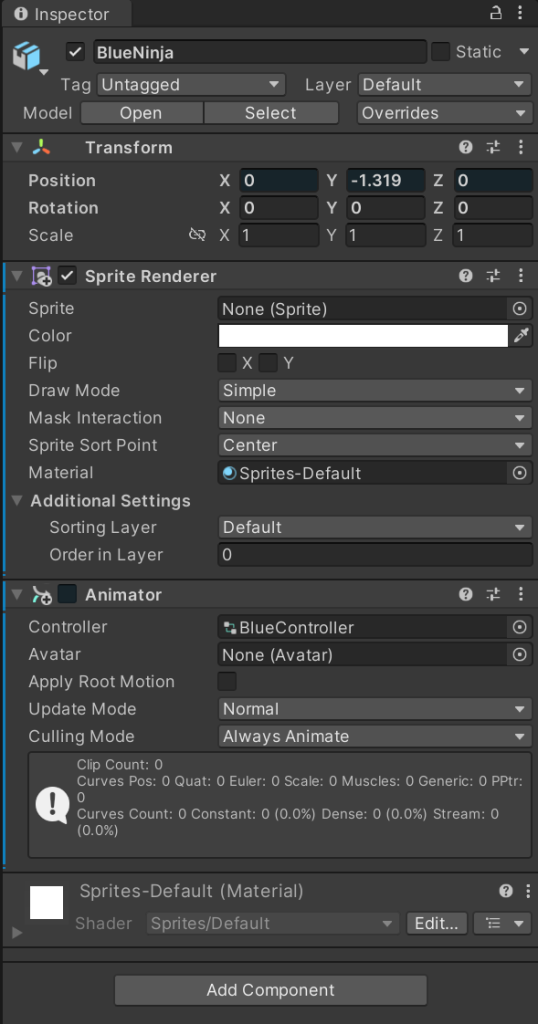
Once I was satisfied with the geometry and my bones, I just simply closed the sprite editor after clicking the apply button to it and dragged the sprite in the hierarchy tab of my unity project. I decided to create a few platform sprites for the blue ninja sprite for purely aesthetic reasons but if I were to create a game using a sprite that has bone rigging, then I would have to include a platform for mechanics reasons. I then added an animator component into the inspector of the blue ninja so that I could refer to the controller that I created for it as seen below.
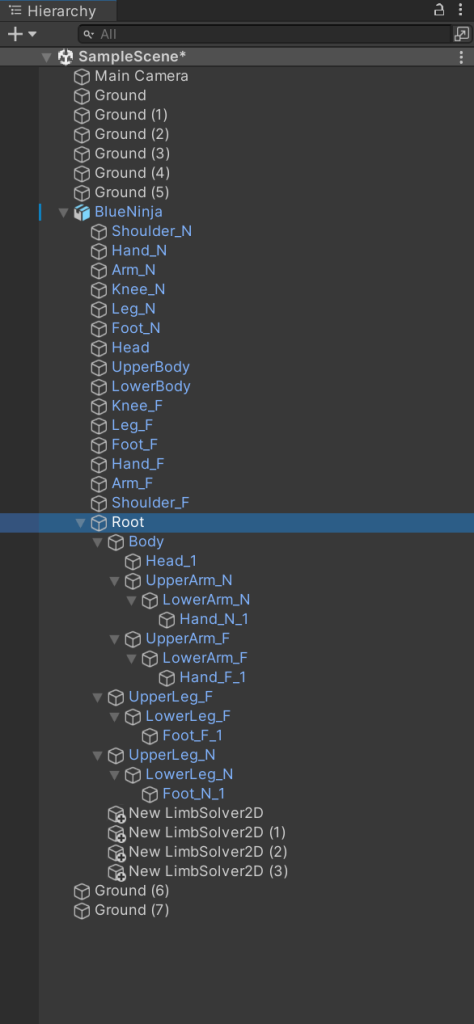
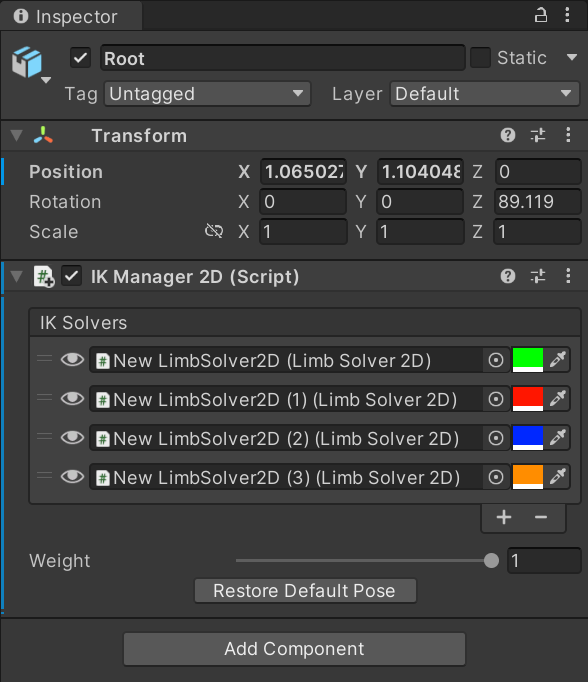
Afterwards, I scrolled down the hierarchy until I found an object named “Root”, which is the base bone that I created earlier, and added a new component to it called “IK Manager 2D. This component allowed me to create 4 game objects called “limb solver 2D”, which allowed me to control the movement of each individual limb so that the limbs do not bend the wrong way and move in an irregular fashion so that the animation would run smoothly as a result of this.
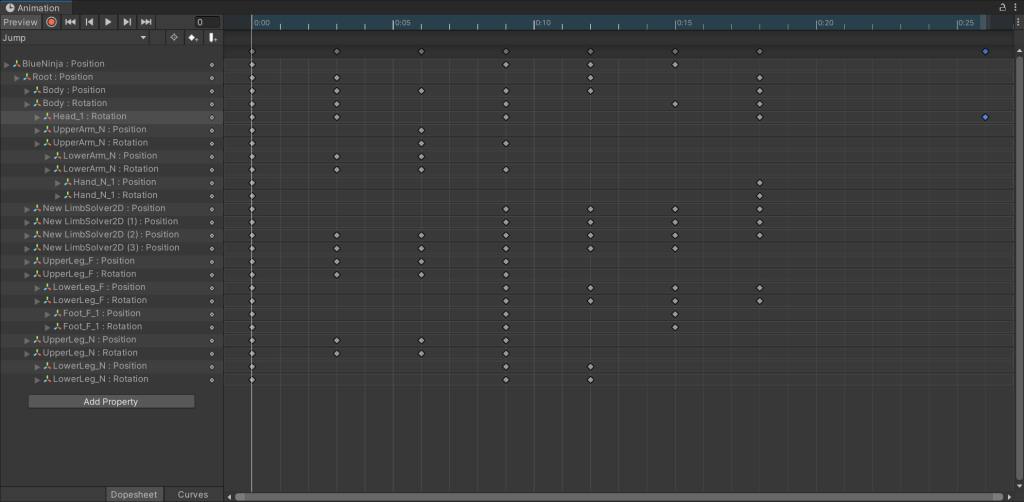
Finally, I created a walk, a jump and an idle animation for the blue ninja sprite by using the animation window that I got earlier. I made sure to make the animations as smooth as possible by not moving the character too much within each frame, so that it would not look as if the character just randomly changed position. I also thought about the animation principles whilst making these animations, like using pose to pose to make sure that the animation is at the right speed and is time well whilst also saving me a lot of time in the process.


Conclusion
In conclusion, I think my experimentation with the bone rigging went smoothly, even though there were issues with it like the limbs not turning in the right direction and the geometry forming in only one limb when I generated it due to me selecting that limb which made me restart with placing the bones on the sprite and therefore delaying the time where I would do the individual frames in. The animations look smooth, even though I can improve on them as it as they are not the best, especially the jump animation as I did not include the landing of the character right afterwards. In my next project I am hoping to expand on the knowledge that I have acquired through this project and use it to my advantage so I do not have to draw individual frames for some of my characters, therefore saving me a lot of time in the process.
References
(1) Admin, C. (2015) 12 Basic Principles of Animation. Compulsive Creative. Available online: https://www.compulsivecreative.com/12-basic-principles-of-animation/ [Accessed 14 Dec. 2022].
(2) Becker, A. (2015) 12. Appeal – 12 Principles of Animation. YouTube. Available online: https://www.youtube.com/watch?v=_SplEuWp0Yw [Accessed 28 Feb. 2020].
(3) Porri, C. (2017) Lesson #6 – Slow In & Slow Out. I Want to be…an Animator. Available online: https://iwanttobeananimator.wordpress.com/2017/03/29/lesson-6-slow-in-slow-out/.
(4) Rinaldi, D. (2014) Principles of Animation: Arcs. Dante Rinaldi Design. Available online: https://danterinaldidesign.com/principles-animation-arcs/.
(5) Stockdale, B. and 360South (2021) The 12 Principles of Animation – Part Three. www.360south.com.au. Available online: https://www.360south.com.au/blog/article/27/the-12-principles-of-animation-part-three.html [Accessed 14 Dec. 2022].
(6) Voinovski, V. (2015) Vlad’s Studio Practice: 12 Principles of Animation: Solid Drawing. Vlad’s Studio Practice. Available online: https://vv258313-sp.blogspot.com/2015/10/12-principles-of-animation-solid-drawing.html [Accessed 14 Dec. 2022].