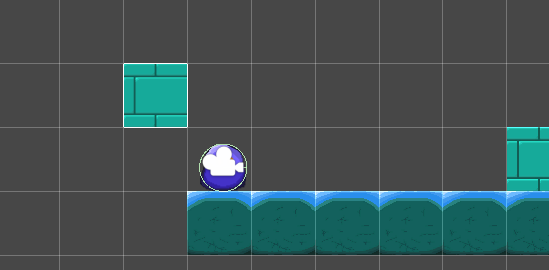
The final game that I have created for this project is a Platformer that I called Slime Runner, the player character was heavily inspired by the pink slimes from “Slime Rancher”, but I changed a few things to make it look more distinct (such as the purple colour and no mouth). I decided to make my game based on an alien world where the player character is an alien slime trying to avoid robotic enemies.
Link to Platformer: Slime Runner by DinoBoi111 (itch.io)
Setting up Unity
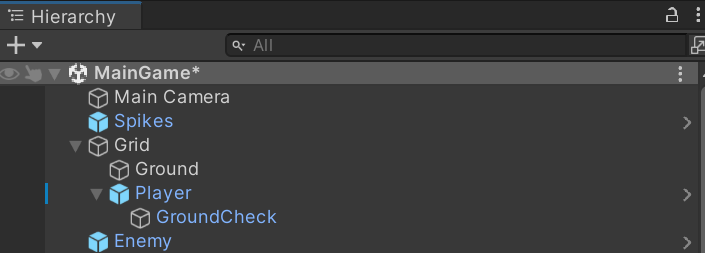
To start off with, I set up my unity project in the usual way (like I did for the ratman chaser and space invaders), and added two extra windows, one being called animation and the other called tile palette (I will talk about those later on in this post). Then, I added all of the artwork I have made to the sprites folder in the assets tab and then put each image to a folder of each character and object (player, enemy, environment). I also created a tile map in the hierarchy window which generated two game objects: “grid” and “ground”. This created a grid in which I could place some tiles in (or platforms in this case). I made sure to adjust the size of the squares in my grid to 1.28, since my tile sprites are 128 pixels in size and the number 1 in a Unity project is equal to 100 pixels.
Placing Tiles and using Tile Palette
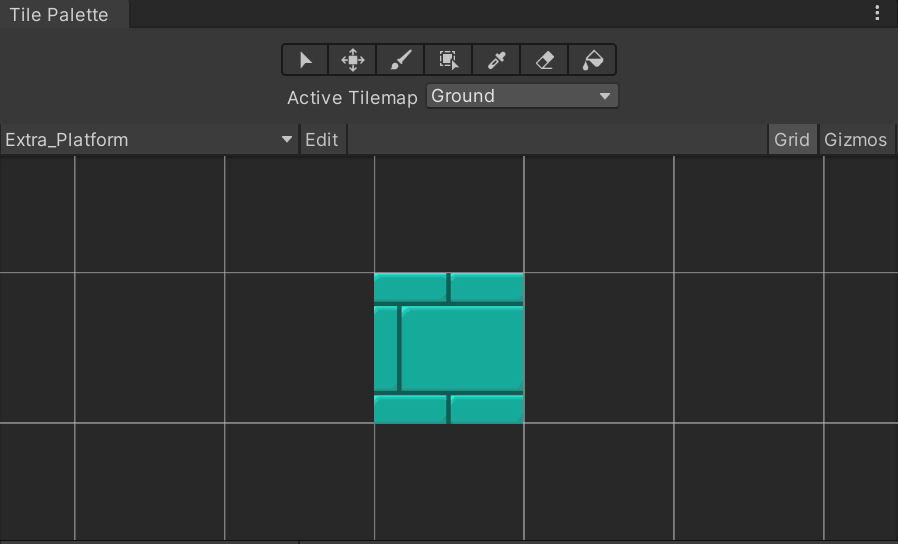
I started off this project by placing tiles on the grid that I mentioned earlier, and the way in which I did this was by using the tile palette window. I able to do this by creating two new tile maps, one being called extra platform and the other being simply just called ground and made sure to drag the relevant tile sprite that I wanted to use for these. I made sure to save both of these tile maps into the tiles folder in my assets tab so I would know where they are in case I would need them. I also made sure to add a rigidbody 2D component and a box collider 2D component into the ground game object and made sure to freeze the tiles in position as I would not want the tiles to move around everywhere while at the same time being able to collide with other objects. After that, I added in the tiles that I wanted by selecting the relevant tile maps and clicking on the paintbrush icon seen in the tile palette and deleted them by clicking on the eraser icon and the tile which I wanted to delete. After I was done, I simply clicked on another game object which made me be able to continue with the creation of my game.
Layers and collision
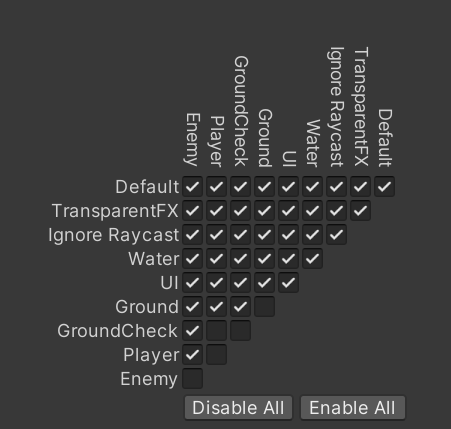
Like I mentioned earlier in my top down shooter write up, I layered and tagged each game object that I wanted to collide with other game objects (ground, enemy, player, ground check) and unticked any game objects with these layers and tags that I did not want to collide with certain other objects in the physics 2D option that is located in the project settings window.
Player Movement, Jump and Animation
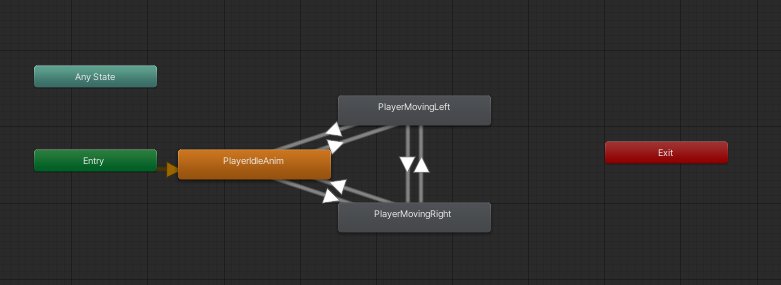
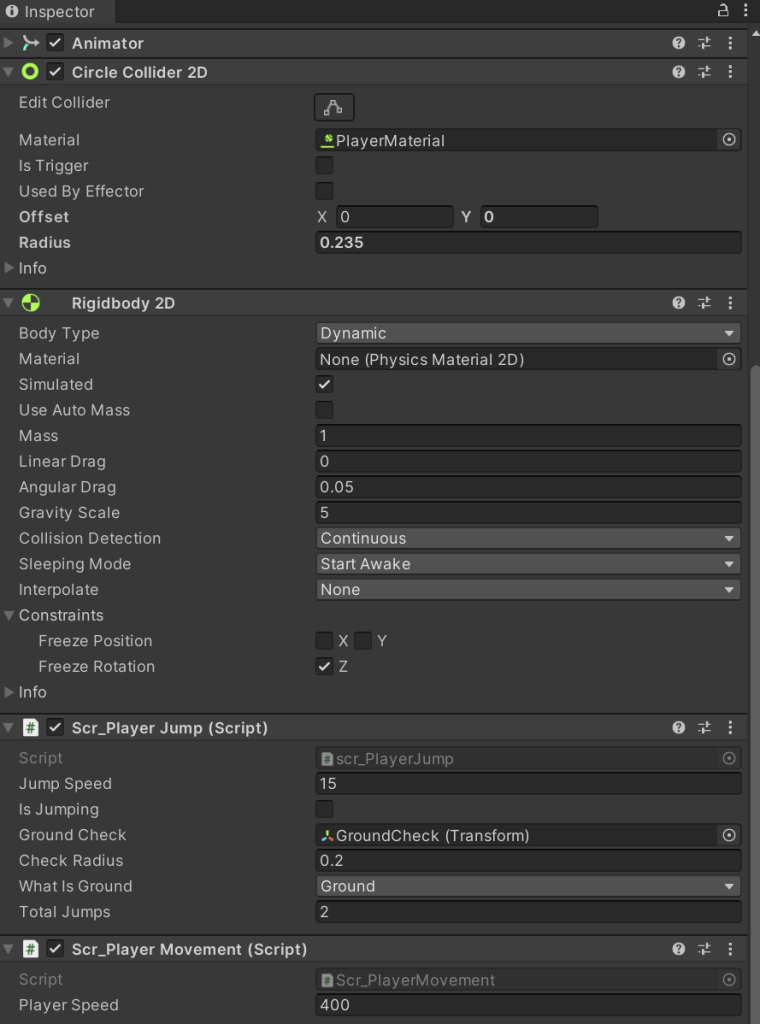
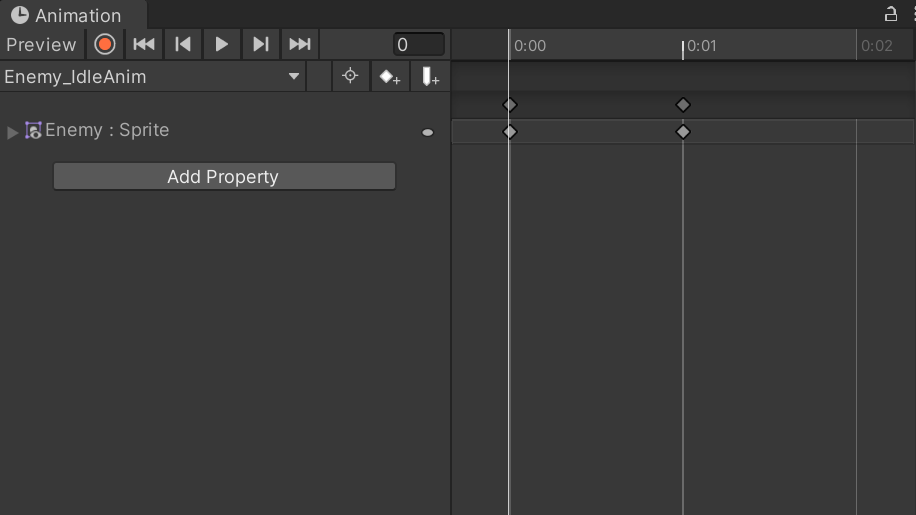
So, I started making the player by dragging the two sprites making up my player character idle animation into the hierarchy window (as seen in a previous image). I did not have to use the animation window but, I know that it allows me to create an animation by using a few movement images of a sprite and dragging them into the right hand side of the animation window. I used the other way to create animation, which is by simply importing all the frames/images for the animation to the assets tab and then to the prefabs tab at once. This allows me to create an animation instantly and save it where the sprites are located. So when I dragged the player into the hierarchy window it only created one game object rather than two, which is what I want. I did the same thing for the frames for the other animations, but I made sure I put them into the exact player sprite, just so that all of the player animations will be in the player. I added the animations separately from each other since I want them to be different events in the player animator, like seen below on the right. The animator works by creating a condition (in this case, I created an integer condition called WalkState) and setting a base number for that animation (in this case, it is zero). The animations that I created are events in the animator and the arrows allow for these events to transition between each other seamlessly. Furthermore, I also had to adjust the speed of each animation to 0.6 for moving left and moving right and 0.2 for idle since I do not want the animation to be very fast. I then added the circle collider 2D and rigid body 2D components into the player inspector so that they would not fall off the map when the game starts.

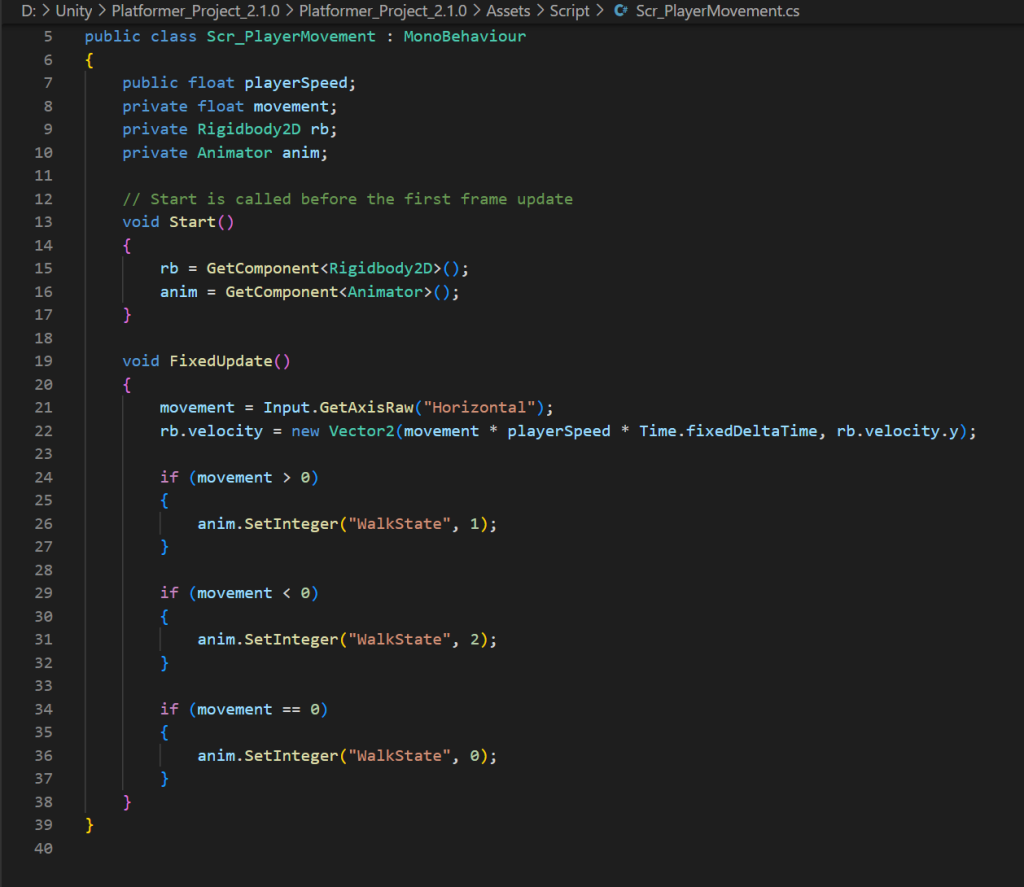
After that I made 2 new c# scripts for the players movement and jumping and named them “scr_PlayerMovement” and “scr_PlayerJump” as seen below. The player movement script has four variables, with one of them being a private animator anim and the other being a private rigidbody 2D rb (like seen below on the left). The void start function in this script references the rigidbody 2D and animator components in the player like seen in the player inspector (which is shown above) and the void fixed update function allows the player to move left and right in a horizontal axis, while also activating the animations associated with those movements through the walk state that I set up earlier in the animator.
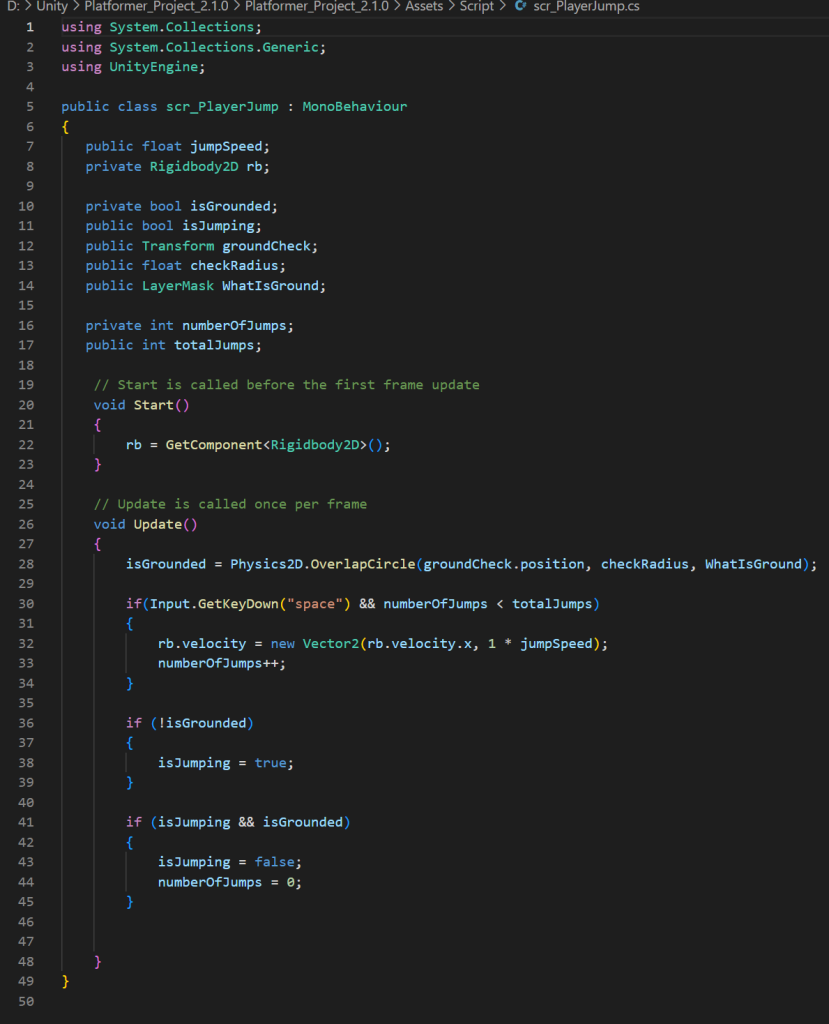
For the player jump script (shown below on the right), I have created more variables. “Public float jumpSpeed” controls how high the jump will go, “public bool isJumping” checks if the player is jumping and “private bool isGrounded” checks whether the player is touching the ground or not. “Public Transform groundCheck” and “public float checkRadius” will check the surrounding area and the ground check object to see if it has changed position. “Public Layermask” will reference the layer that I named for the ground so that the rest of the code does not get confused on what the ground is. Finally, “private int numberOfJumps” and “public int totalJumps” control the amount of jumps that a player can do, which in my case would be 2. To put it simply, this script allows the player to able to jump whilst also controlling when the player can jump and how many times they can jump.
Camera Movement
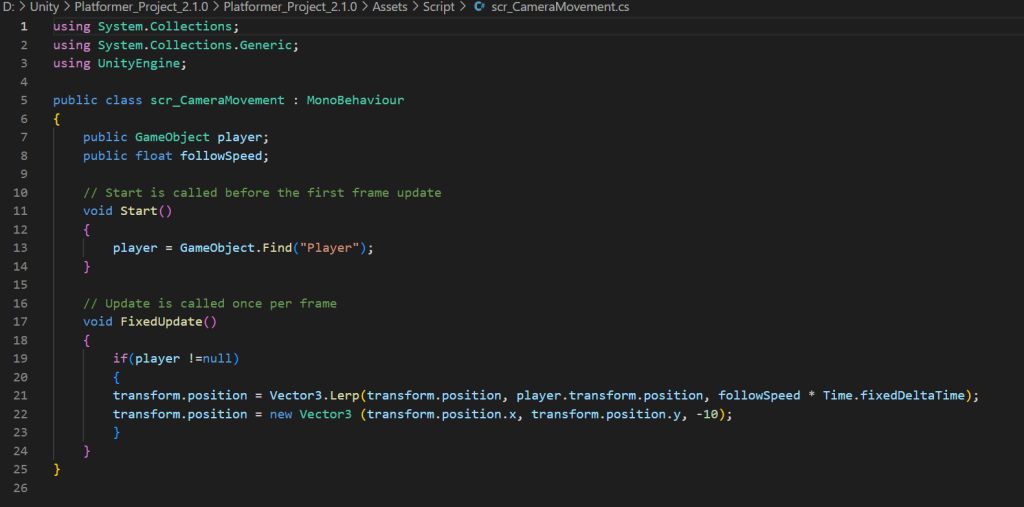
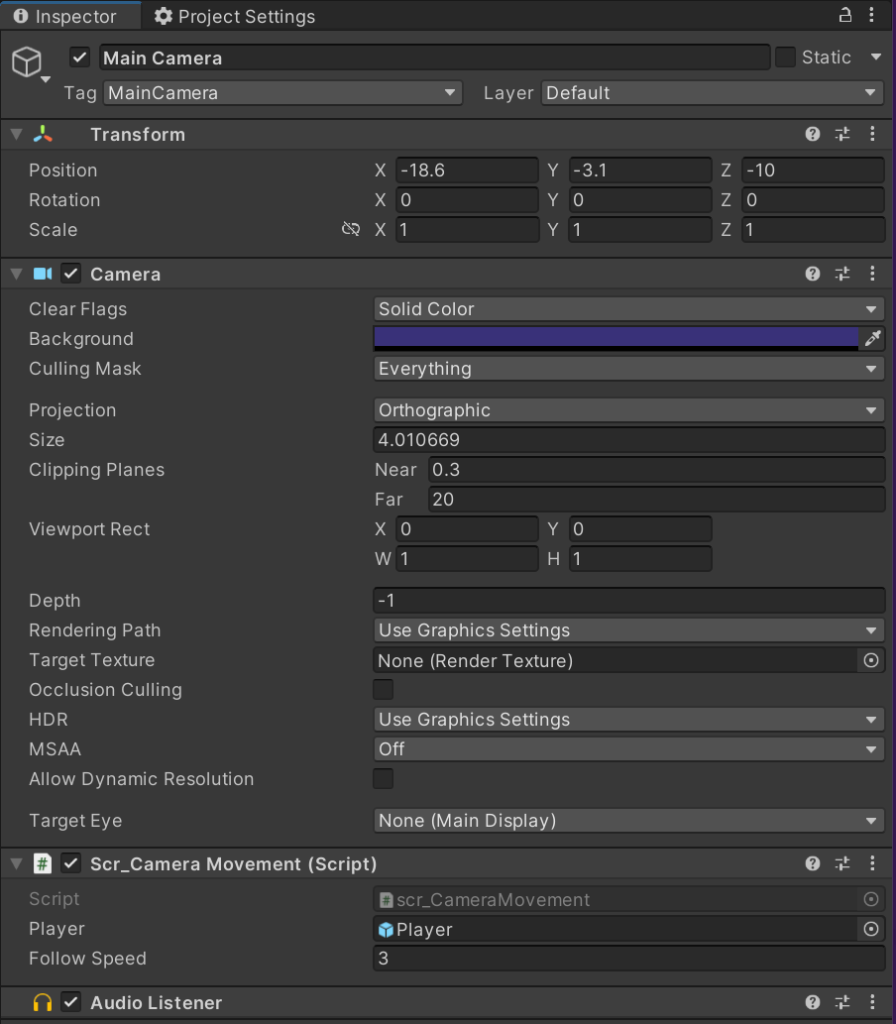
Afterwards, I decided to focus my attention to making the camera being able to move with the player. So, I made a new c# script and named it “scr_CameraMovement” and attached it to the main camera inspector (like seen below on the left). This script has only two variables: “public GameObject player” will be where I reference the player sprite for the main camera to locate it while “public float followSpeed” is basically just the speed at which the camera will follow the player. In the void start function, the code will tell unity to search for the game object that has a layer/tag that is named “Player”, which in this case would be our player character. On the other hand, the void fixed update function will be activated once the player has died and/or has fallen off the map, it basically stops the camera from following the player once one or both of those things have occurred. (Script can be seen below on the right).
Enemies and hazards
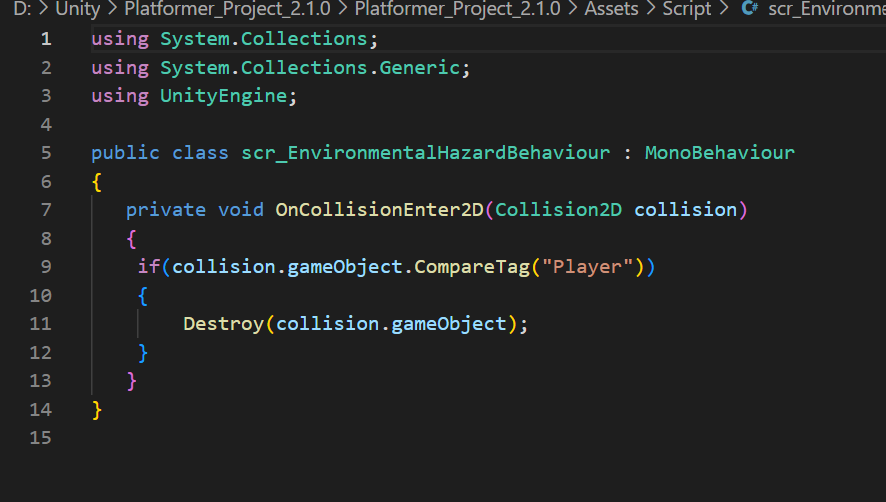
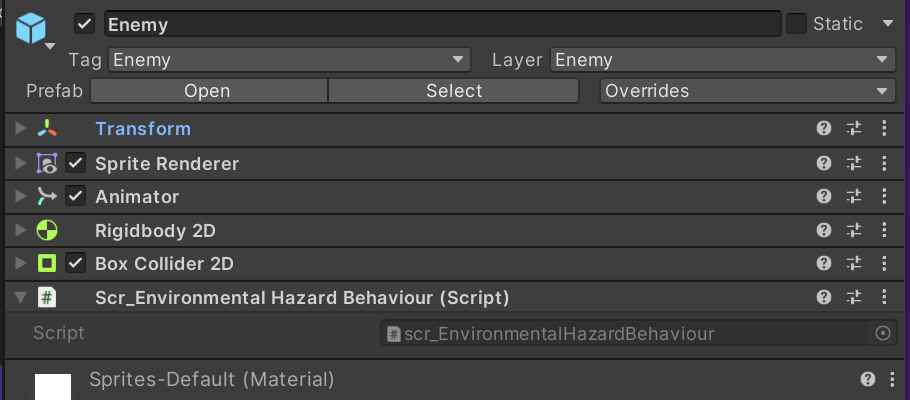
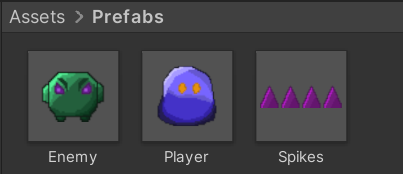
When I finished that off, I moved onto creating enemy and spike sprites. I created a c# script that I attached to both of these that I called “scr_EnvironmentalHazardBehaviour” and made sure to attach a rigid body 2D component and a box collider 2D component to each of them (also, I froze movement for the spikes as I would not want them to move). This script only has one function that activates only when an enemy or a spike collide with the player, and it basically destroys (or kills) an object that has a “Player” tag attached to them which in this case would be the player of course. After that, I made sure to put both the spikes and the enemy sprites into the prefabs folder in my assets tab, so I can add more of them in case I wanted to do so.
Ground Check Game Object
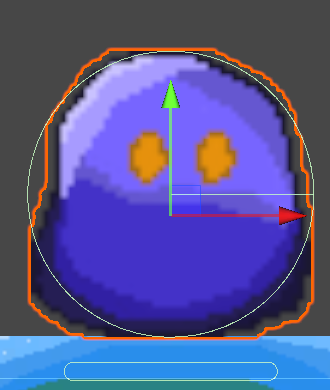
Finally, I had to make a new game object called ground check, which is the child object of the player. I added a capsule collider 2D component into it and set it to horizontal and is trigger (as I did not want the player to float as a result of the capsule collider) and adjusted its position and size so that it is just below the player and small enough to not take up too much space (screenshots of this can be seen below).
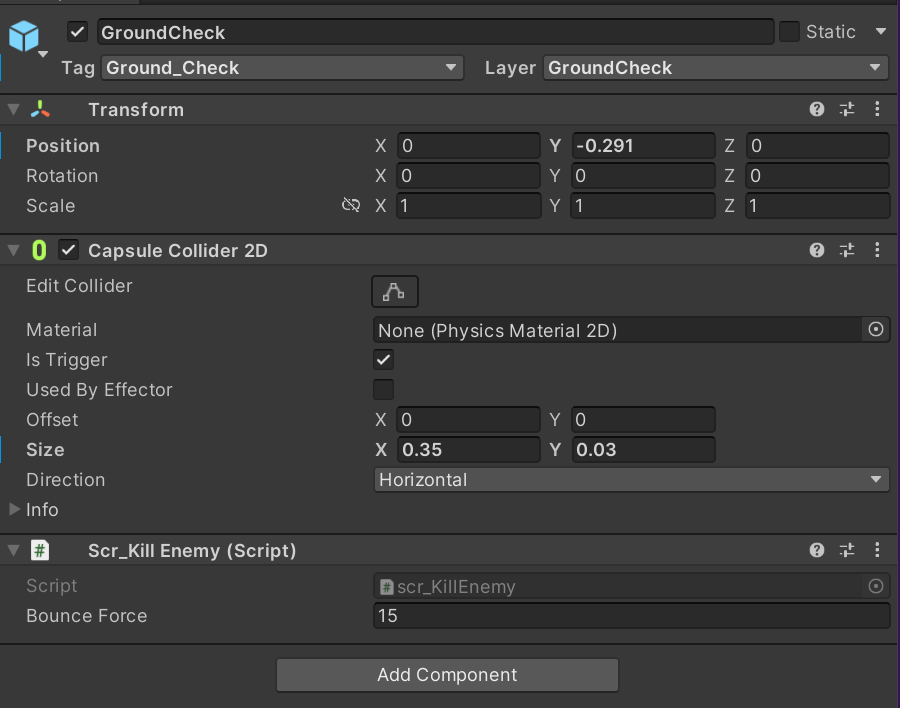
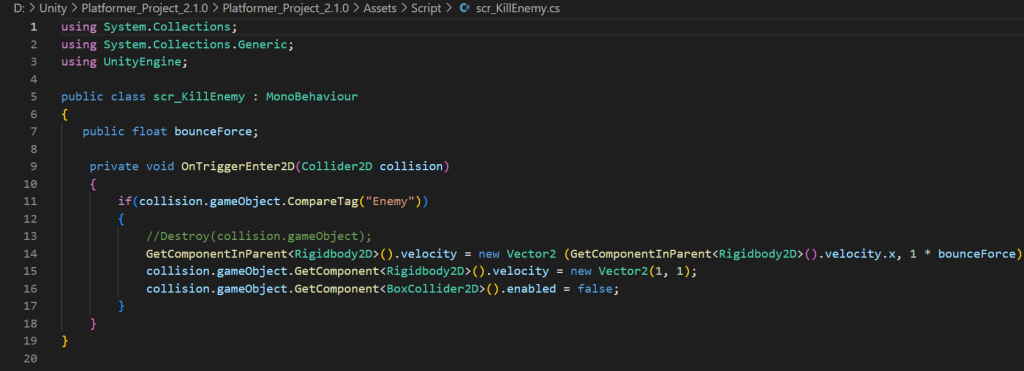
As seen above, I also added a new script into the ground check inspector called “scr_KillEnemy”. Like the name suggests, this script will allow the player to kill an enemy, but instead in a Mario style fashion. This script has only one variable and that is called “bounceForce”, which will allow me to adjust how high the player can bounce off the enemy’s head after killing it. The function in this script will target an object tagged “Enemy”, which would of course be the enemy sprite mentioned earlier, and it will basically disable that game object’s rigid body 2D and box collider 2D components, causing the enemy object to fall off the map. The function in this script also references the rigid body 2D component in the player game object so that it would allow the player to bounce up after killing the enemy.
Conclusion
On a final note, I think this game turned out to look pretty good, despite my lack of understanding in creating games before starting to make a game for the very first time. Although, I did have some problems in the way, like the capsule collider in the ground check and the collider in the player, which forced me to redo the player character until there were no gaps in between the edges of the sprite and the edges of the frames in which it was enclosed in. I also did not include any movements to my enemy sprites, which hopefully I will do at some point in the future, as I do know how to do that, but due to me having to also include sounds in my games I did not have the time to do that yet. Animation in Unity seems to be executed pretty well be the engine, though I would recommend that it could make the frames of the animation crop able, as that could have prevented me from going back to adobe photoshop to fix that mistake (although I also should have done that before I added the player sprite into my game). Overall, I think I am happy with the game for now, with hopes to improve on it in the future as I would like to expand on this game whenever I have an opportunity to do so.