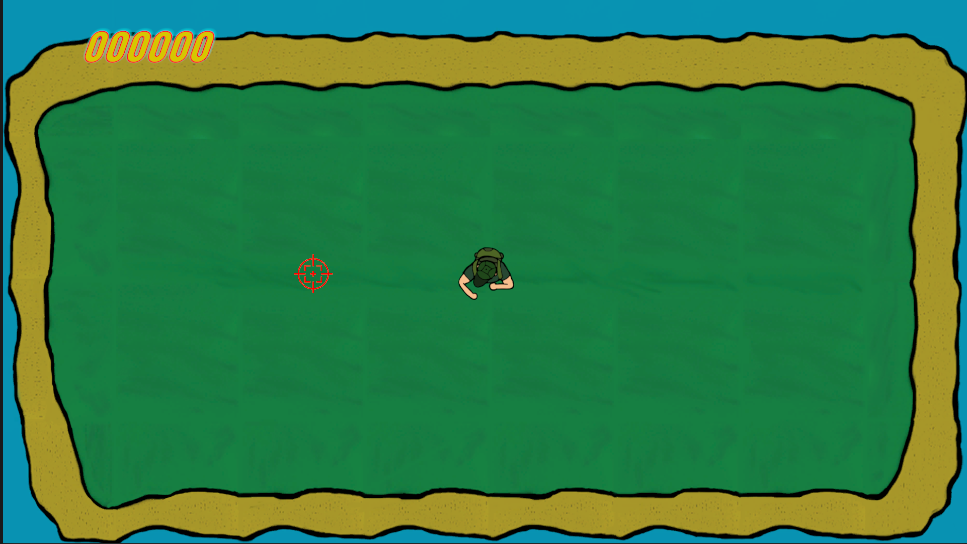
The next game that I have created is a top down shooter game called Ratman Chaser and it’s based on previous top down shooter games that have been made. The only differences are that the game’s enemies are not humans but instead are ratmen (hybrids of humans and rats) and the background and character are different. Also, the player character does not have a gun but throws knives at enemies instead.
Here is a link to the game: Ratman Chaser by DinoBoi111 (itch.io)

Setting up Unity
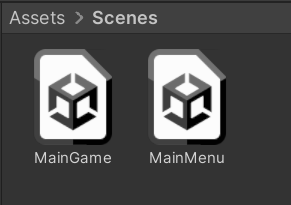
So, to start things off I created a 2D game on Unity version 2022.1.7f as usual. Then, I adjusted the game screen from free aspect to full HD, since free aspect is generally bad to work with on unity. I went onto the assets tab and renamed the already existing scene to “MainGame”, since I would want to add another scene later on called “MainMenu” from which the game would start from. (Image of scenes in assets tab can be seen below).
Player Sprite
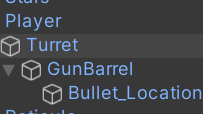
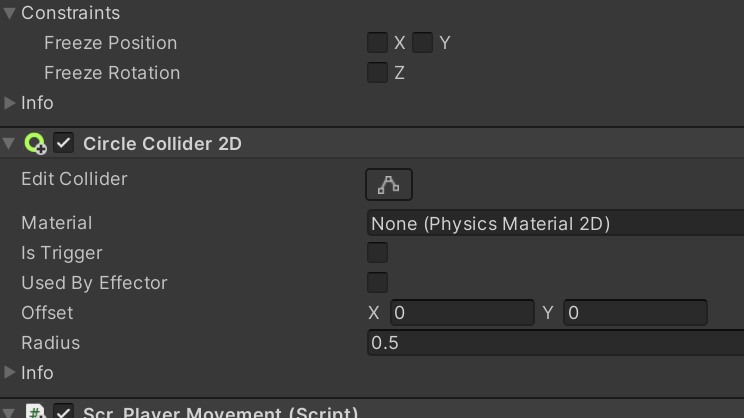
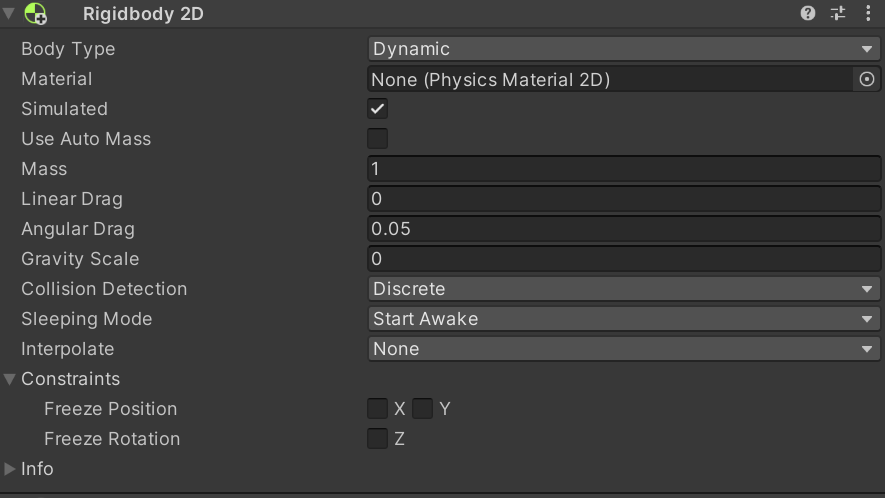
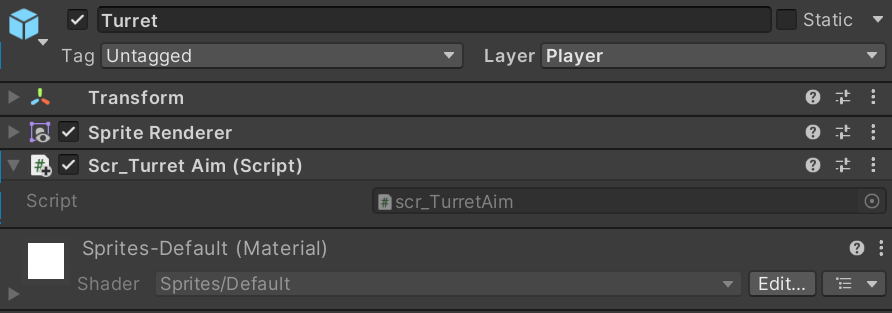
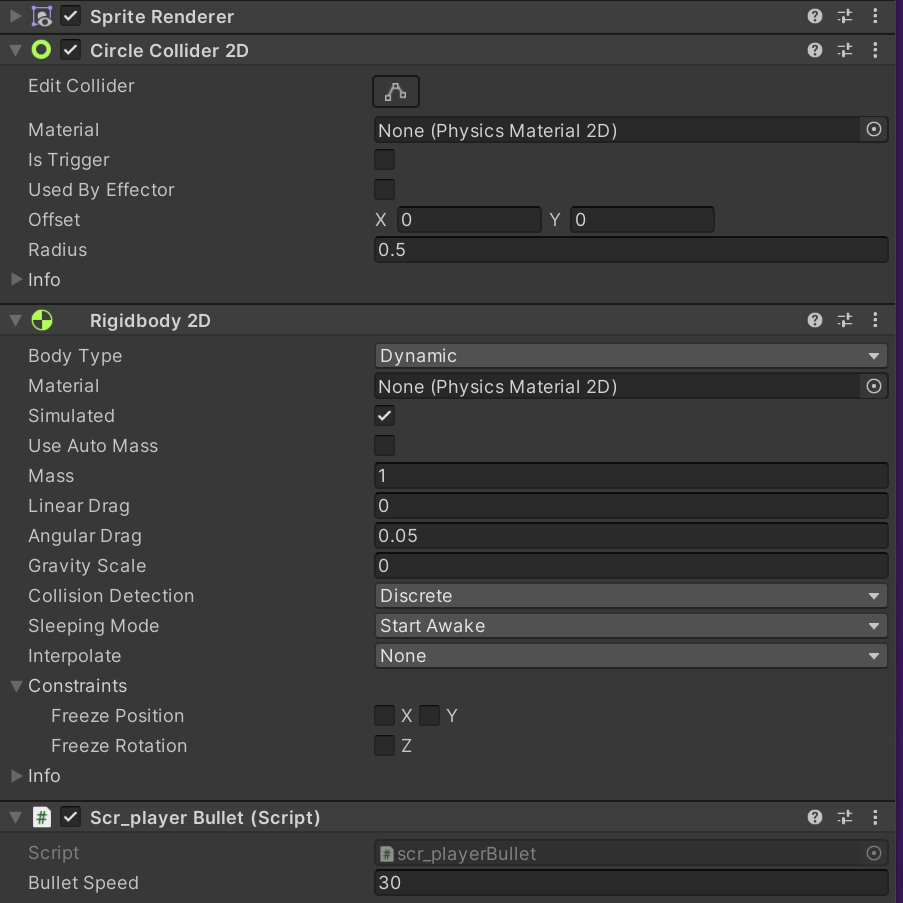
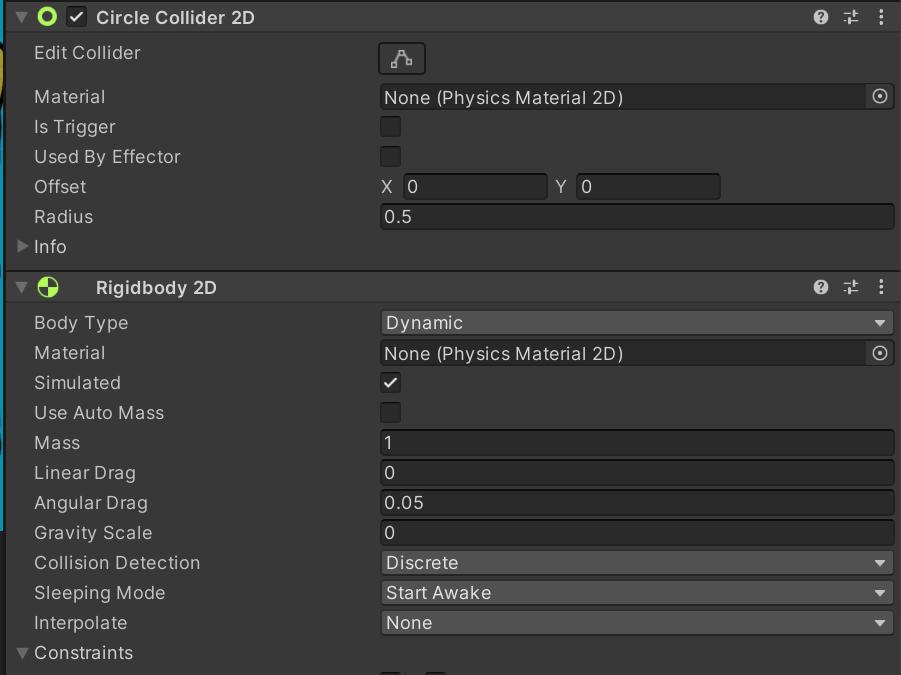
So I started to create the player by creating a new 2D square sprite and naming it “player” so I would remember what it is later on. Then, I created a child 2D circle sprite for the square object and named that the “Turret” and for that object I created another 2D sprite (this time being a square) and name that “GunBarrel”. The turret would be the object that rotates the gun barrel and the gun barrel would be where the next object would be located, which I called “Bullet_Location”. However, for the bullet location object I did not make that into a sprite and instead it was just and empty game object that was sat on the gun barrel. This can be seen in the image on the bottom left. I also created a reticule object for my game which is what I would use for an aim for the player by using their mouse. For the player object, I included a circle collider 2D and a rigidbody 2D as the player would need to collide with the enemy eventually.

Player Movement Script
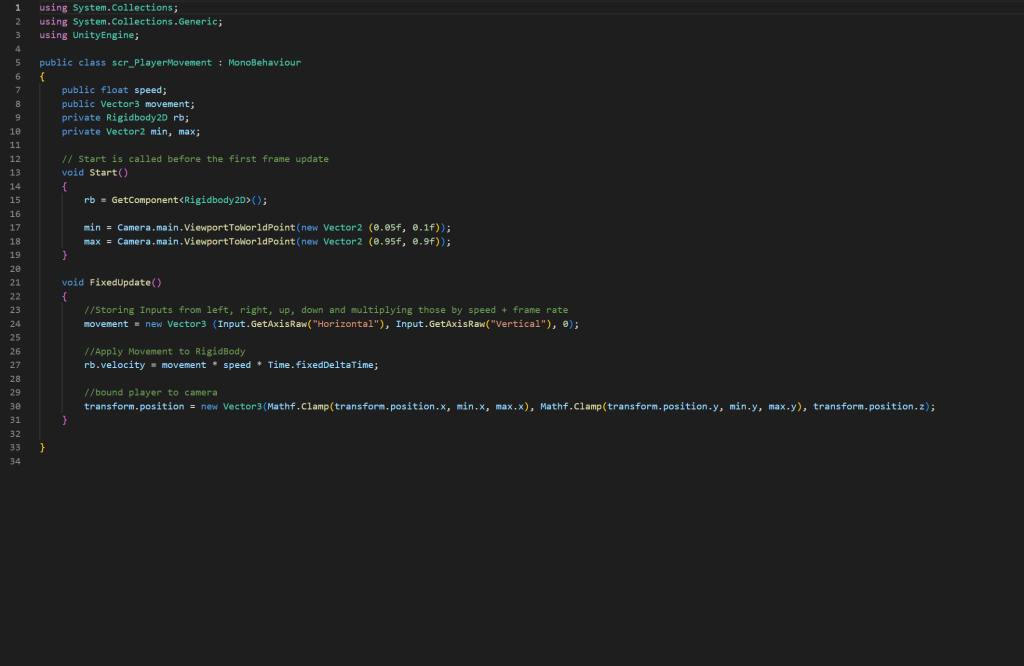
To start off I created a c# script for the players movement as I would want the player to be able to move. The script below will do a few things: to start off with, it will allow me to control the speed at which my player moves, search and get the rigidbody component that I have attached to the player object previously, it will make sure that the player moves up and down on the camera along only the x and y axis (since I do not want to include the z axis in this) and then apply the movement and speed to the rigidbody that I have on the player. The script will also keep the player bound to the camera from the values that I set on the script, which I already set in the bottom of the void start function. I attached the script onto the player character so that it would carry out this function on the player character. The script I used can be seen just below.
Turret Aim and Reticule scripts
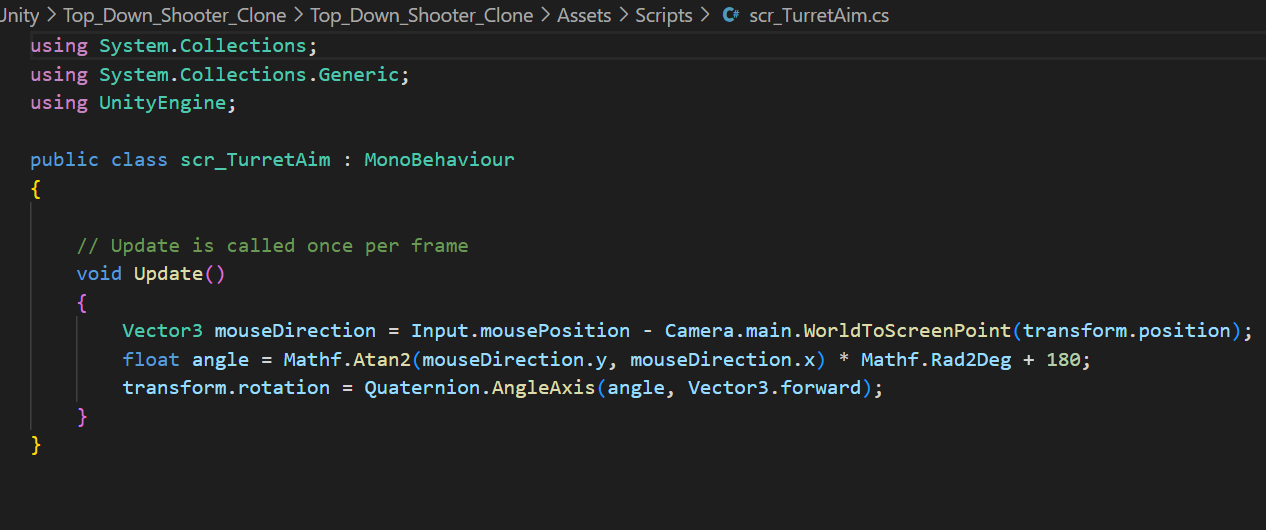
Then, I created a script for the turret aim, which I attached to the turret object that I created earlier. I only needed to include a void update function in this which would basically tell the turret (and any child objects attached to it) to face the direction in which the mouse is going in while staying in a single place. Float angle controls the angle at which the turret is facing the mouse, this is important as the turret has to face the cursor (or in this case the reticule) so that the bullet would hit it’s target. Script is shown below.
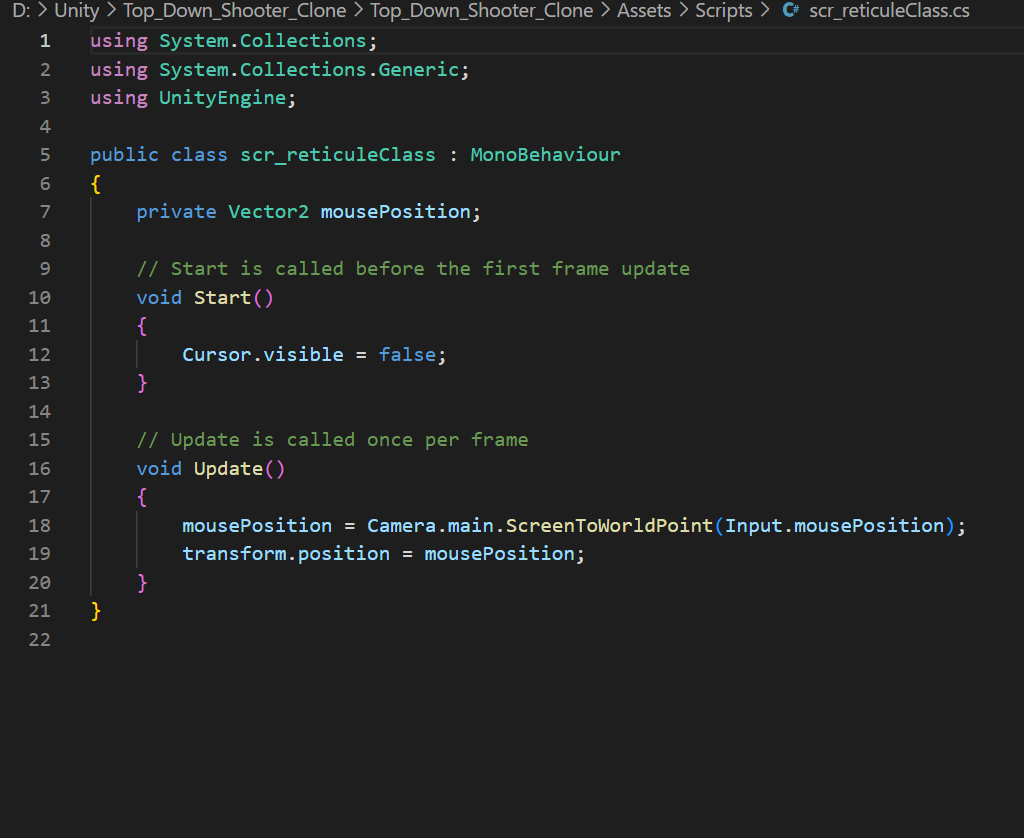
The script shown below is the script that I have attached to the reticule object that I have created in the hierarchy earlier. The variable in this script is referencing the position of the mouse cursor and the code in the void start function hides the cursor so that the reticule is shown instead. The code in the void update function will make the reticule move wherever the mouse cursor moves by following its position. Also, there is no collider component included in the reticule inspector as I would not want it to collide with other objects such as the player or the enemy.
Player Shoot script and Player Bullet script
I added the player bullet sprite into my game and also added it to the prefabs folder I created in the assets tab, of course adding the rigidbody2D and collider 2D components afterwards. Then, I created another c# script with bullet speed, mouse position and bullet direction variables. The void enable function is a new function which will allow the bullet to carry out its functions as soon as it is fired/instantiated. what the function basically carries out in this is to get the rigidbody 2D component and change the velocity of the bullet (or in this case a knife) to equal the direction in which the bullet travels and the speed in which it does so. On line 16 of this script, we can see that there is a function that is called “Normalize”, which basically creates a string with the same textual value with the only difference being that its representation in binary is in the form of Unicode normalization. The invoke is basically calling out a method or a function, which in this case would be “destroyThis” which basically destroys the bullet after a certain amount of time (in this case it’s 1.5 seconds).

Then, I created another c# script that I placed on the bullet location child object created earlier. In this script, the variable is referencing a game object that is in the game, which in this case is the bullet/knife sprite that I just created earlier on. The void update function has an if statement which asks whether the player has clicked the left mouse button. If the player has clicked the left mouse button, then the bullet/knife that I created earlier will be fired. The generate bullet function is basically referencing the bullet so that the game can spawn it into the scene as soon as the function is triggered in the direction that the reticule is located, which is also referenced in the player bullet script that I just talked about earlier.

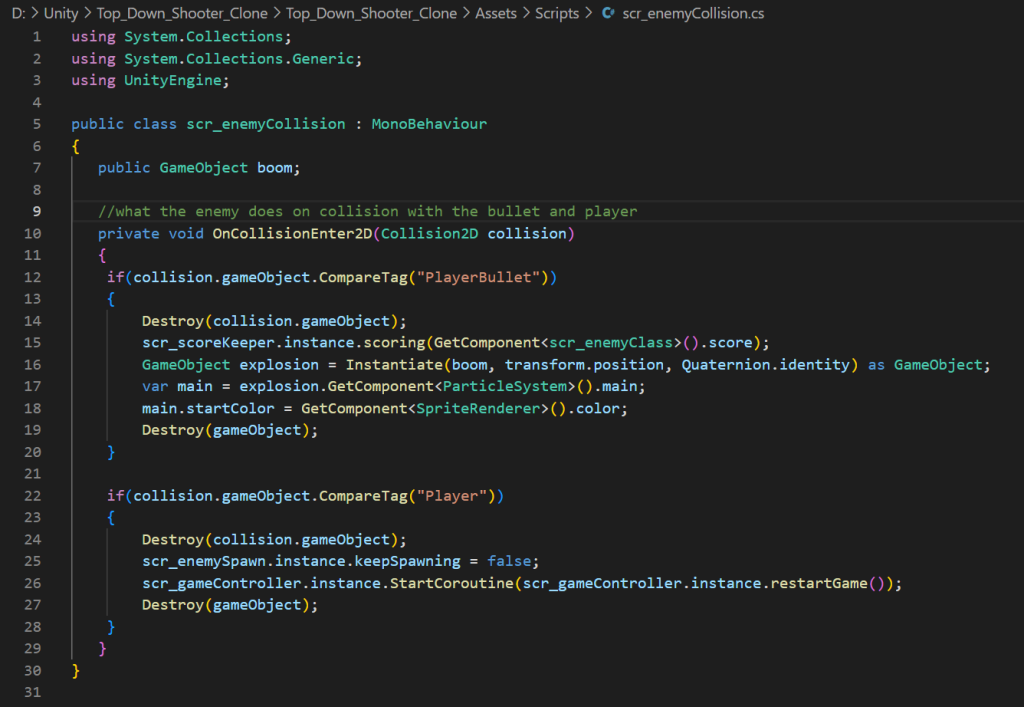
Player Collision Script
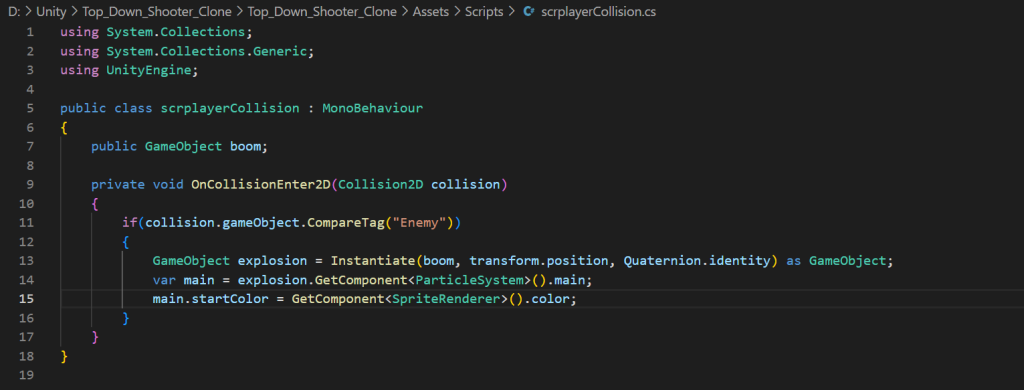
Once I finished with the other player scripts, I included the script below which will basically as soon as the player collides with the enemy sprite which I will talk about later on. The game object boom variable references the explosion that I have created previously (inspector of that object is seen just below the script). The on collision enter 2D function will activate that game object once the player has collided with the enemy, which is tagged as “Enemy” in my case. Other than that, there is not much to this, apart from the fact that it gets the components from the explosion game object and the player character so that the explosion will be the exact same colour as the colour which the player is set to.
Enemy Sprites
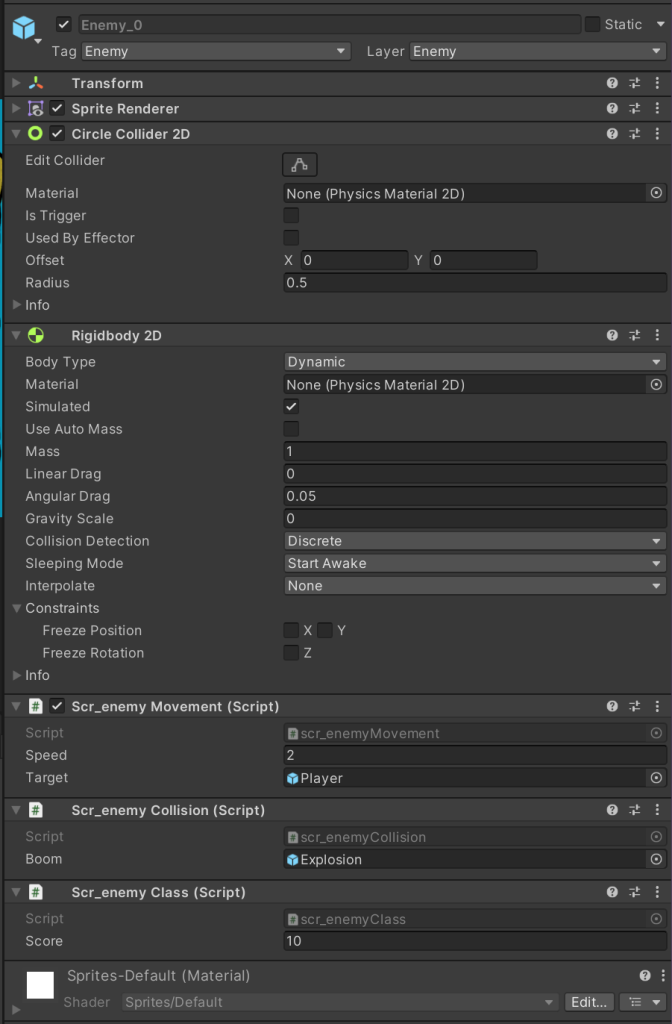
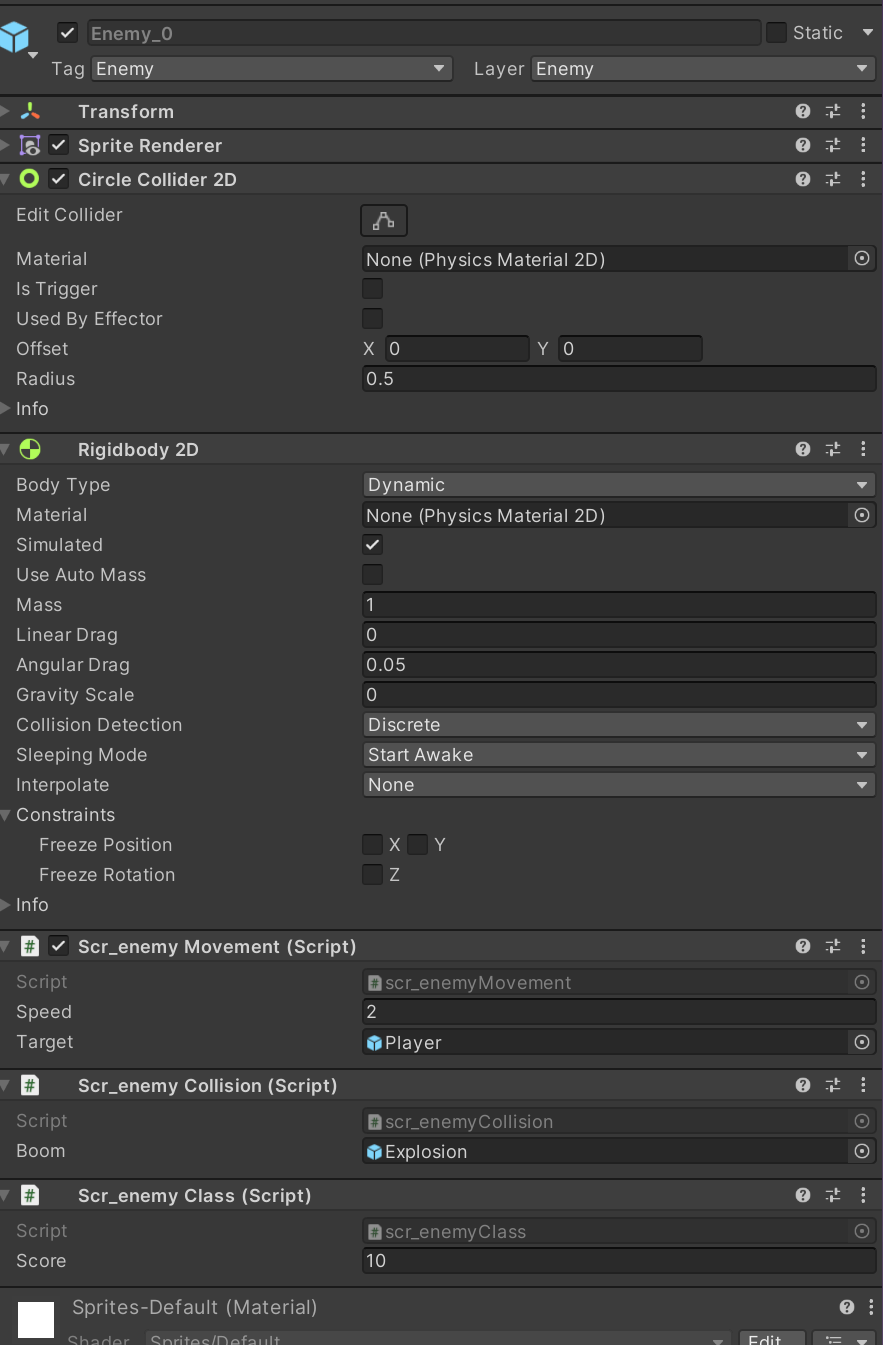
So, for the enemy sprites I added a circle collider 2D component and rigid body 2D component, like I did for the player and player bullet sprites, as I would want the enemies to collide with the player bullet and the player themselves for an interesting gameplay. I also made three different coloured enemies and put them into the prefabs folder in the assets window, like I have with the player and the player bullet, since I wanted some enemies to be faster than other enemies and possibly even have them shoot unlike the other enemies.
Enemy Spawn Script
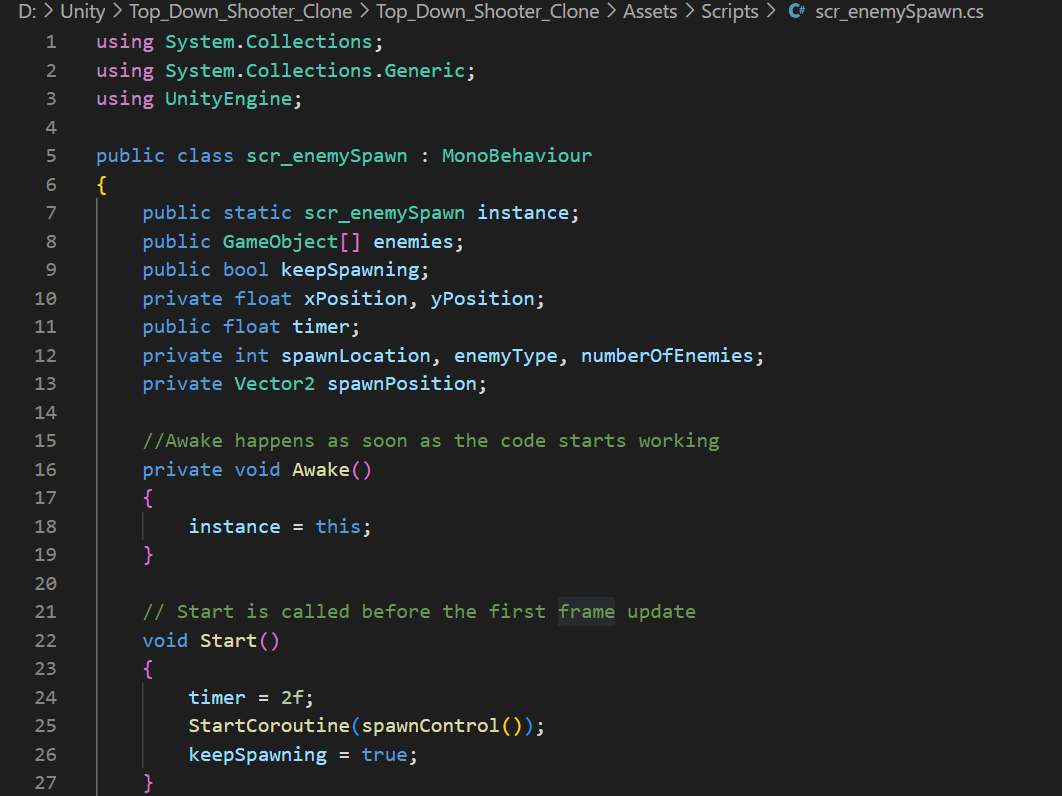
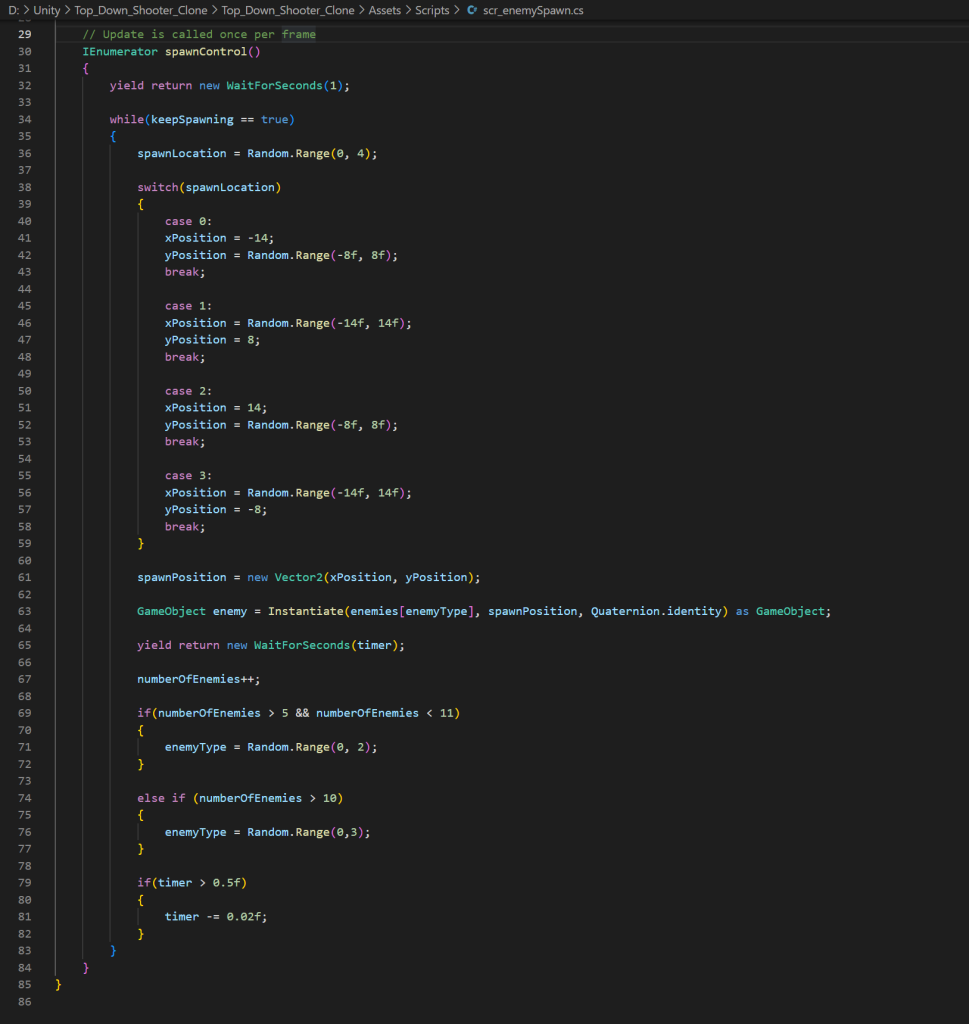
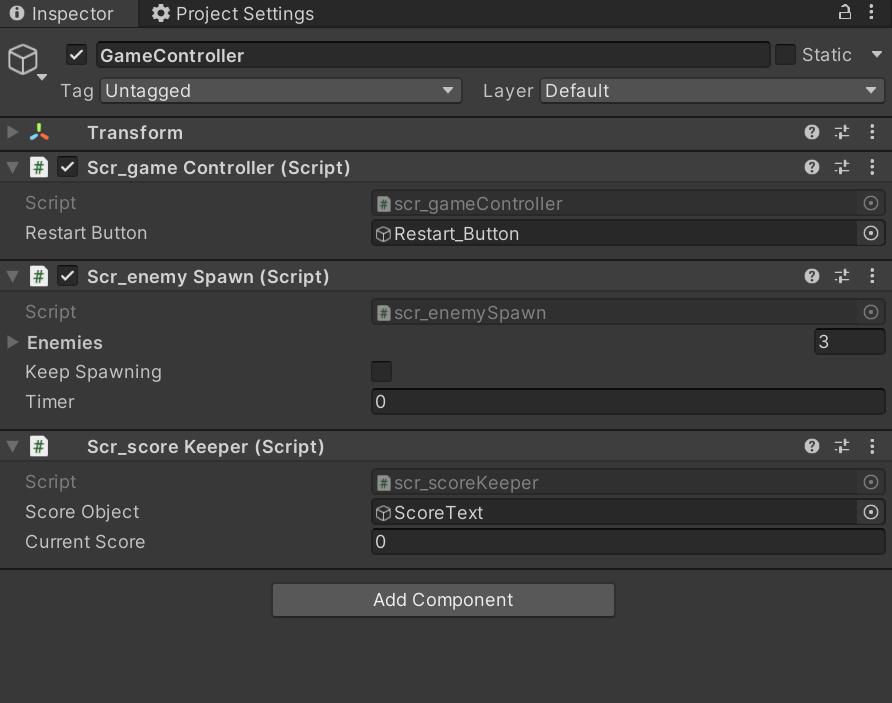
After sorting out with creating my enemies, I created a new c# script that would allow my enemies to spawn randomly and attached it to the inspector window of the game controller gameobject that I had created. (Shown in screenshot below)

There are a lot of variables in this script (as seen on the bottom left screenshot). “Public static scr_enemySpawn instance” refers to this script and “public GameObject[] enemies” refers to the three different enemy types in the game. The “keepSpawning” bool will be important as I would want the enemies to keep continually spawning and the “timer” float will control the timings between each enemy spawn. “Private int spawnLocation, enemyType, numberOfEnemies” will control the location, the type of enemy spawned and the number of enemies that will spawn and the last two variables to talk about are “private float xPosition, yPosition” and “private Vector2 spawnPosition” will both control the positions in the screen where the enemies will be able to spawn from. Like seen on both the screenshots below, the functions build up on these variables.
The private void awake function happens as soon as the code starts running in the game and in this case it tells the code in other scripts that this script is the one to look for. The void start function sets the timer in which the enemies spawn, in this case it would be 2 seconds like seen below on the left, the Boolean keepSpawning is also set as true since I want the enemies to keep spawning. The start coroutine line of code is also important as that would allow me to create an IEnumerator function, which in this case would be called “spawnControl” like seen on the bottom right. This function has two yield return new statements that are really important as the script waits for a certain amount of time before the script continues with carrying out its functions. If the keep spawning bool is true, the script will spawn the enemies at a random location along outside edges of the game screen, since it’s not ideal if the enemies spawn in the screen view or if the enemies spawn far away from the game screen. The break lines on the switch spawn location allows the code to spawn enemies one at a time rather than spawning multiple enemies at a time. The second half of the spawn control function basically allows the game to spawn different types of enemies depending on the amount of time that the player is still alive and the number of enemies that have already spawned. This part of the script refers to the float that has been given earlier (2f) and the game object variable that I discussed previously. The reason as to why I place square bracket near the game object variable is because it will allow me to reference multiple different enemy sprites apart from one, which is put into use later on with the enemy type variable being enclosed in the square brackets.
Enemy Movement script
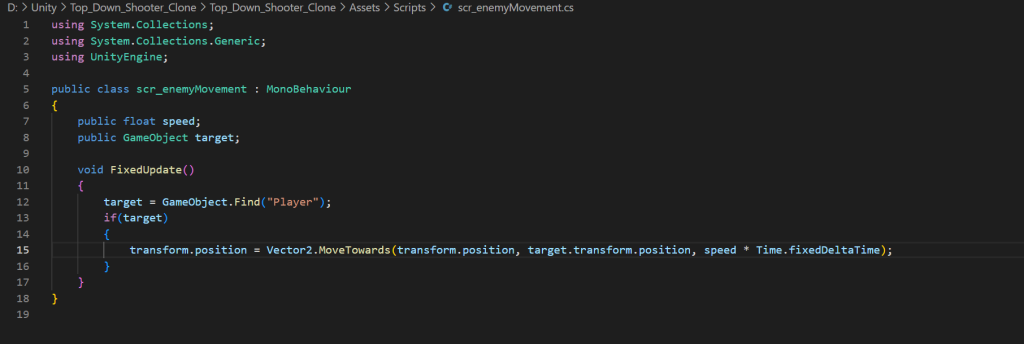
Following the creation of the enemy spawn script, I created a new script for the enemy and placed it into the inspector of all my enemy types. This time, it was a script for enemy movement since I needed an enemies that are capable of movement in my game. This script was simple to make as opposed to the last script. The only two variables that I needed were the public float speed and the public game object target variables. The public float speed variable has been discussed by me before on the player movement script and the scripts in my space invaders game, so I do not have to discuss it here. The game object target variable just refers to the player sprite. There is also only one function in this script, which is a void fixed update function. In this case, it finds the game object that has player as its tag (which in this case would be my player sprite) and if it finds the player, then the enemy would simply move towards it.
Enemy Collision Script
Then, after making that script, I made a new c# script that is similar to the player collision script that I have mentioned earlier with a few key differences. The most striking difference is that this script is longer than the player collision script, and that is because the enemy would collide with both the player and the player bullet. Once the enemy collides with a game object tagged “PlayerBullet”(which in this case would be the player’s bullet), the enemy destroys both the player bullet and itself, while also activating the explosion game object like I explained earlier. It also activates a function from another script called score keeper (which I will talk about later on) which will get the enemy class scrip (I will also talk about that later on) As for once the bullet has collided with a game object tagged “Player” (which in this case, would be the player sprite), the enemy will destroy itself and the player, but this time it will also set keep spawning from the enemy spawn script to false, since I would not want the enemies to spawn after the player has died as it could lead to a potential crash otherwise. This part of the script also activates a function from a different script (using a coroutine) called game controller (which I will also be discussing later on).
After I finished making the script, I attached it to all enemy types like seen on the screenshot I took of one of my enemy’s inspectors, which is seen just below.
Score Scripts
Then after I have made my enemy scripts, I created a new UI text mesh pro and named it score. This object will be important as it will keep track of the score. In the inspector of that UI element, I just changed the text colour and the writing to 6 zeros so that those zeros could change to other numbers when the player kills an enemy.
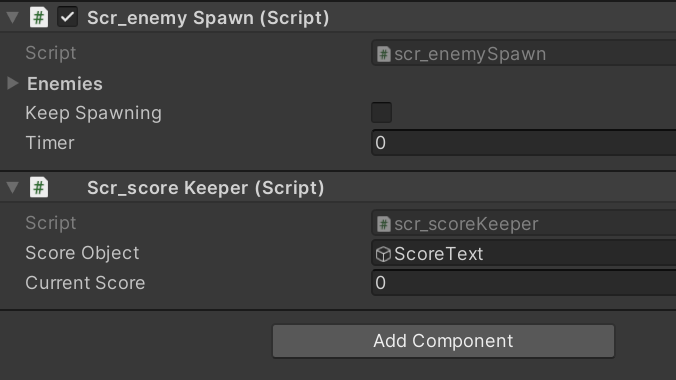
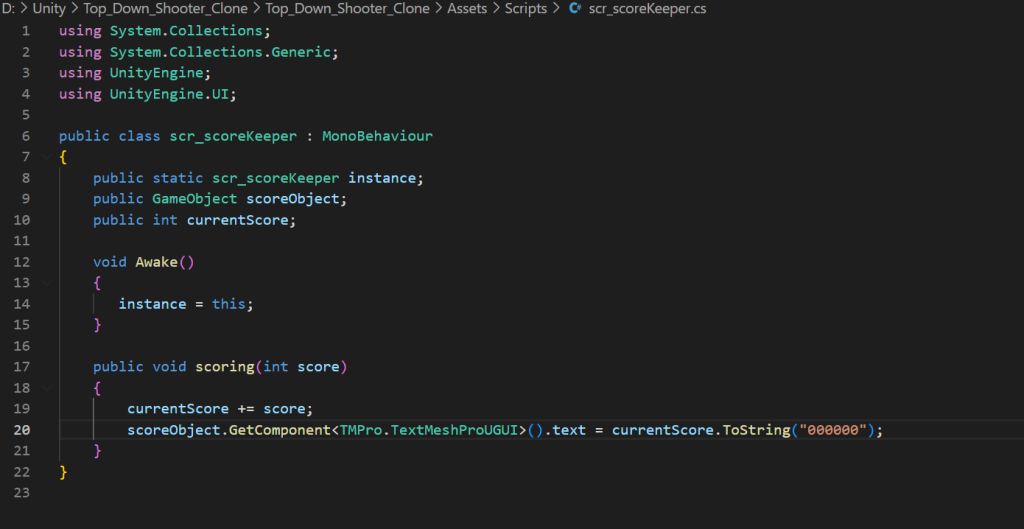
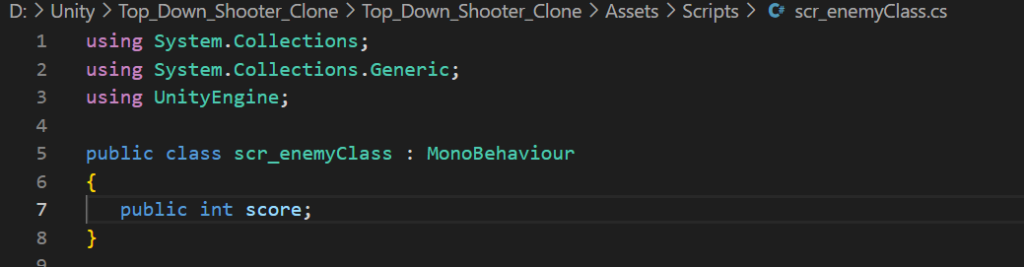
After sorting that out, I created another c# script (called score keeper) and attached it to the game controller inspector as seen above. Like seen below, this script has some similar variables to the ones that I used in other scripts beforehand. “Public static scr_scoreKeeper” instance acts exactly the same as the other public static variable in the enemy spawn script, the only difference is that it references this script instead of the enemy spawn script. “Public GameObject scoreObject” also acts exactly the same ass other public game object variables, with the only difference being that it will search for the text that I have just made instead of enemy sprites. “Public int currentScore” will be the variable that will help change the score and also keep track of it. The void awake function in this script will work exactly the same as the void awake function in the enemy spawn script, in that it allows the script to be referenced by other scripts (like the enemy collision script I described earlier). The “public void scoring (int score)” basically references another script that I have made alongside this script (shown just below the score keeper script), which is called enemy class. The only thing that the enemy class script does here is set an amount of score for each individual enemy and I have attached that enemy class script to all my enemy types so that I can get different scores for killing different enemies. The public void scoring function in the score keeper script also allows me to get the text object so that it will be changed as soon as an enemy gets killed. The code in line 4 acts the same way as the line 4 code for all UI elements in the peach clicker game that I talked about earlier, it basically allows this script to identify that it is working for a UI element rather than a normal game object.
Layering and Collision
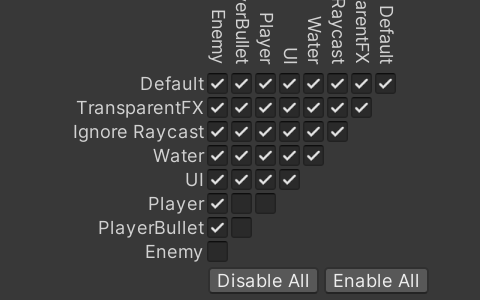
When I was making my character sprites working, I added layers to player, player bullet and enemy sprites. I then went to the project settings window, clicked on physics 2D and scrolled down to the right angled triangle with ticks all over it (seen just below). What this triangle does is it basically allows me to control what each object in the game can collide with and what objects it can not collide with. The ticked boxes signify that the object can collide with the other object and the unticked boxes signify that the object can not collide with the other object adjacent to it.
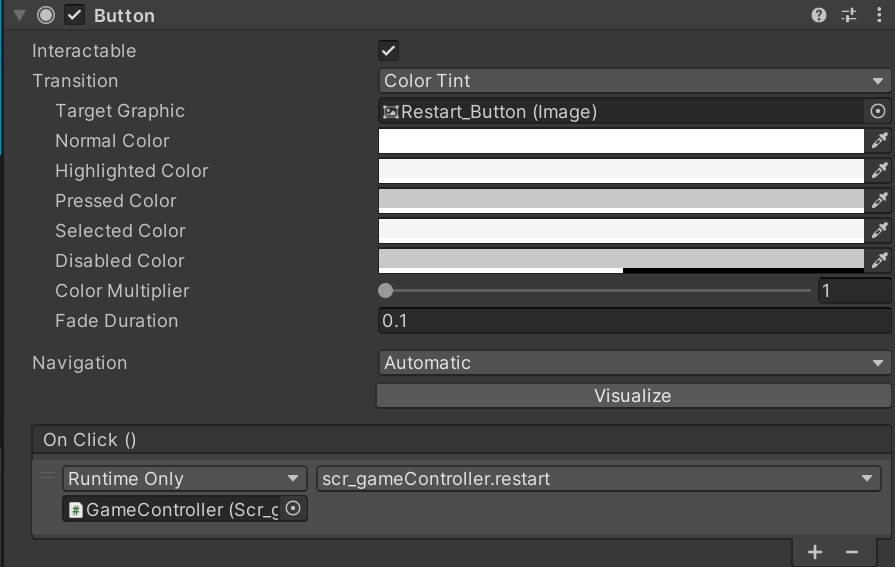
Game Controller and Restart Button
Then, I went on to create a c# script that I attached to the game controller object inspector mentioned earlier and called it game controller. The “public static scr_gameController instance” variable and “private void Awake” function work in the exact same way as the similar function and variable found in both enemy spawn and score keeper scripts, with the only difference being the script that is referenced. Same applies to “public GameObject restartButton” as all that does it allows us to reference the restart button object that I have created in the hierarchy window (which I made transparent as to avoid it blocking the view of the game). The void update function is basically what will allow the player to exit the game after pressing the esc button. The IEnumerator function builds upon the coroutine set earlier in the enemy collision script, and that will activate the restart button (as I deactivated it intentionally when making it). The public void restart function basically reloads the whole game scene (MainGame) so that the player could start playing again. (Screenshots of the script and game controller inspectors can be seen below). “Using UnityEngine.SceneManagement” is is important here as well as without it the main game will not be able to reload otherwise. I also attached the game controller script to the restart button inspector so that Unity knows when to activate the load scene function in the game controller script.
Main Menu
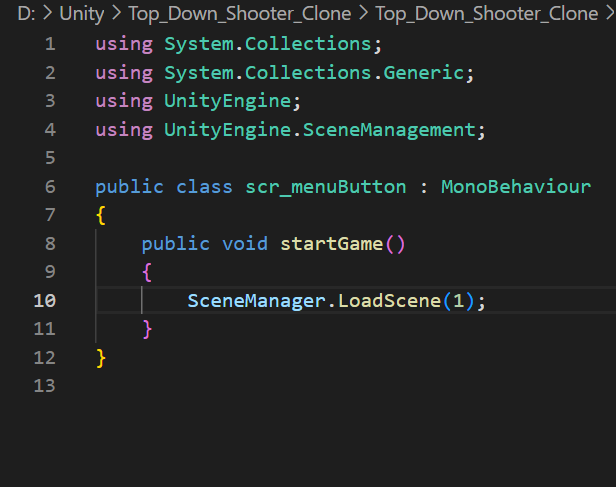
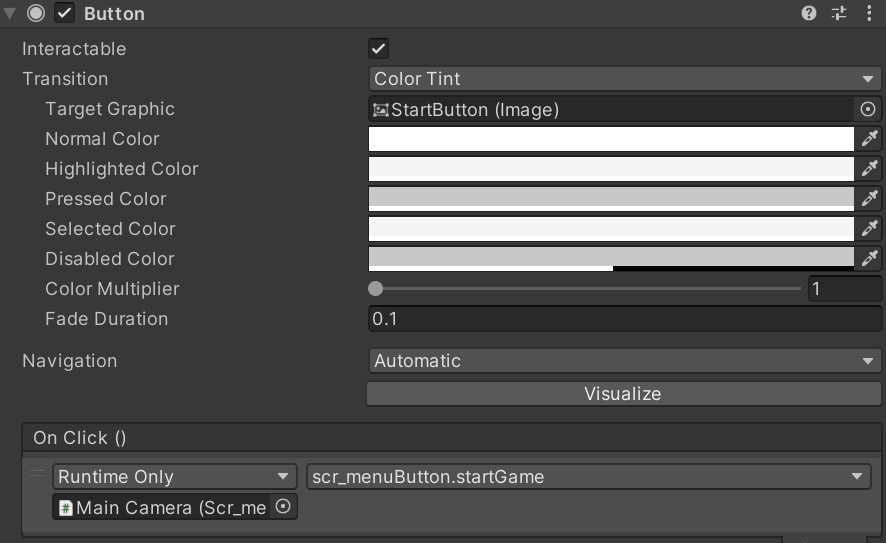
After I finished what I had to do in the main game, I saved everything that I adjusted in the main game scene and went to the start game scene. The first thing that I did was create a menu button that would be the same size as the game screen (like the restart button) and a few UI text objects. Following that, I made a new c# script that I attached to the menu button inspector and called it scr_menuButton. This script only has one function, which is called “void startGame”. This function acts like the restart game function I described earlier but it only activates when the menu button is clicked instead (both menu button inspector and script are shown below).
Overall View of my game
In conclusion, I think this game turned out pretty well, I did have minor problems when I was writing the code but that was mainly due to the writing errors that I have made along the way. Also, there is an issue that involves my enemies not rotating towards the player while they are moving towards them, which I will improve once I gain more understanding on c# scripting later on down the course. I will also mention the fact that I did not add any more than three enemy types and all that they do is run towards the player and that is it. I could potentially include an enemy that shoots the player rather than only run towards them, just so that the player could have more enjoyment whilst playing my game. Also, Unity does have quite a few flaws with it’s system, like always putting the camera onto free aspect view or the fact that the project settings window is not on the unity screen by default. These are some small improvements for unity but I think it could improve my experience with the software, as it would be a beneficial quality of life change. The most challenging part of making this game as a whole was getting used to working on two scenes rather than one, and that is because up until now, I only created games that had only one scene in them entirely and that was definitely a massive step forward towards my understanding of making my game. Despite this, I am pleased to say that this game is finished for now but that does not mean that I will not come back to it again, because most probaly I will at some point in my future.